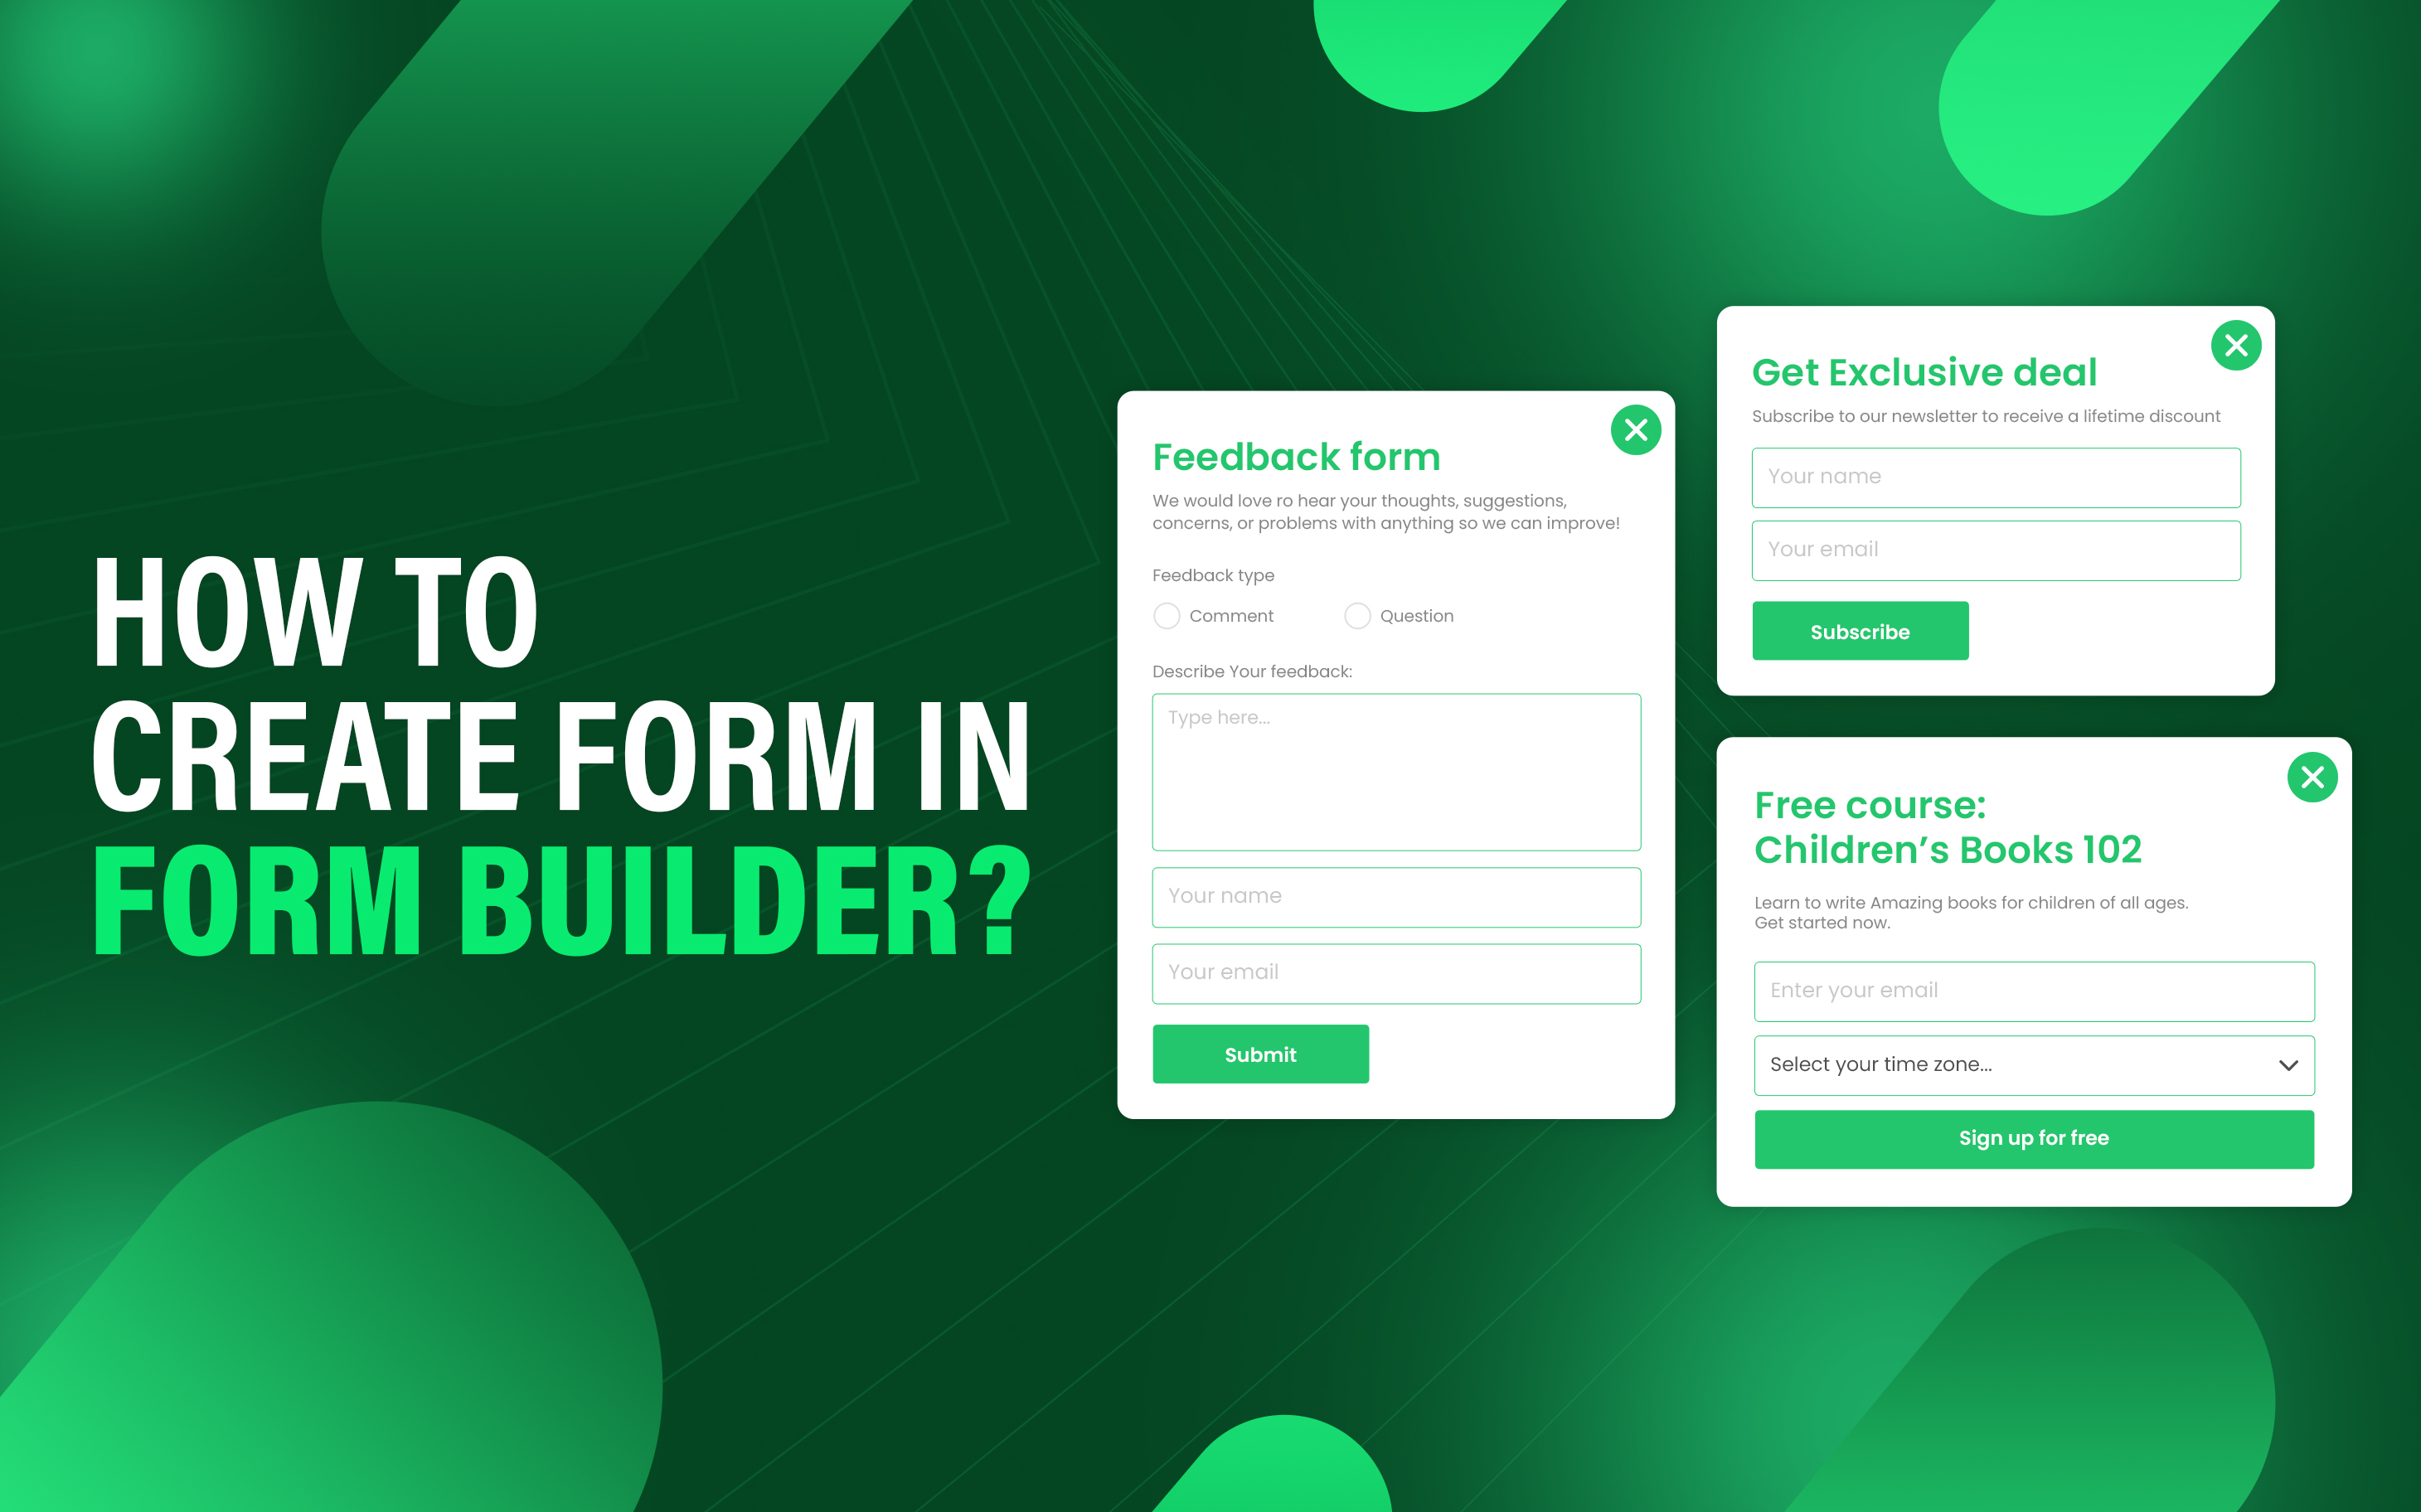


How to Create Form in Form Builder?
Form builders help users to create custom forms with any technical knowledge. With its user-friendly interface, businesses can design forms to collect customer details efficiently.
These tools offer customizable templates that include text fields, checkboxes, file upload, conditional logic. Many form builders also support automation enable action such as sending email and store responses in the database.
These forms are embedded on product pages, checkout pages, and pop-ups to generate leads or conduct surveys. This improves user experience, reduces development time, and integration marketing tools.
To create a form in a form builder, follow these steps:
- Plan your Form
- Choose Form Builder
- Create New Form
- Configure Form Setting
- Publish Form
- Analyze Response
1. Plan Your Form
Clearly define the purpose of your form and information you need to collect. This involves identifying the target user, and necessary data fields required like name, phone number, and email.
For example, if you are creating a registration form, you should determine what details are necessary, such as name, email address, password or any additional field. It is essential to structure logical flow of fields, group related fields improve user experience and completion rates.
Additionally, distinguish between required and optional fields to ensure users only provide necessary information.
2. Choose Form Builder
Selecting the right form builder app depends on factors like integration with Shopify, customization, ease of use, and pricing. The best choice is SyncForm due to its robust features, drag-and-drop functionality, and strong user base. It also provides affordable pricing plans, making it suitable for businesses of all sizes.
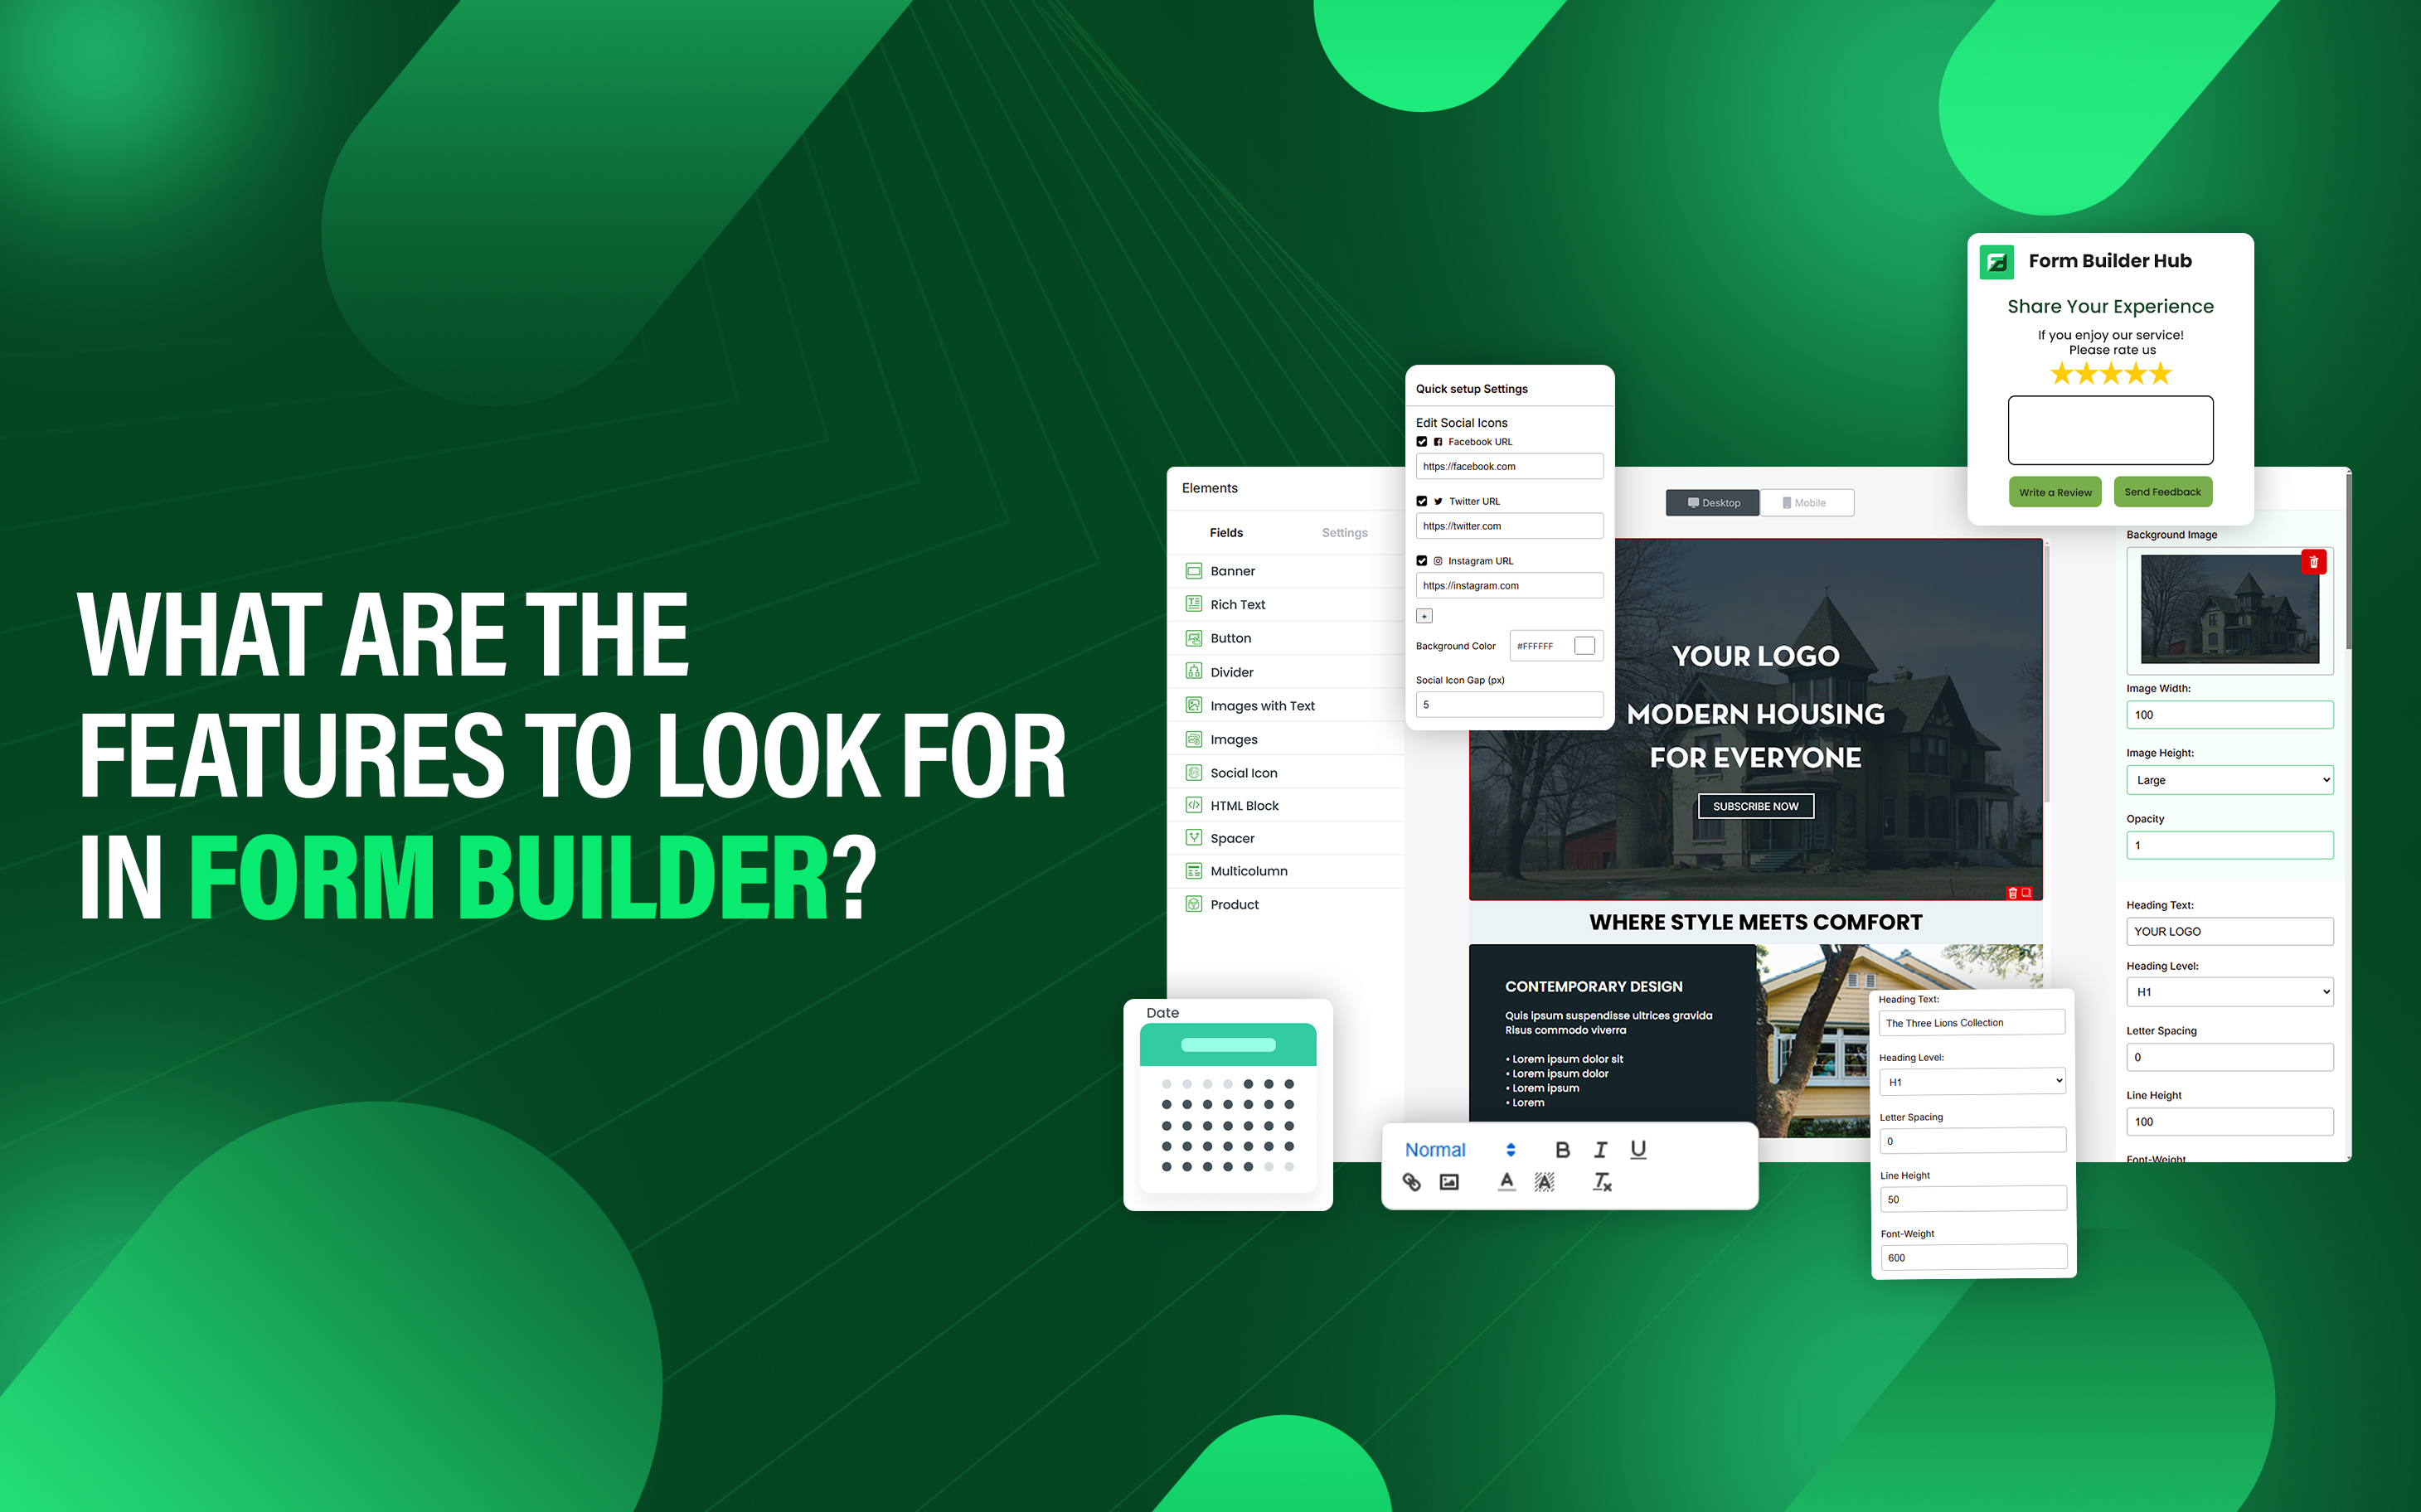
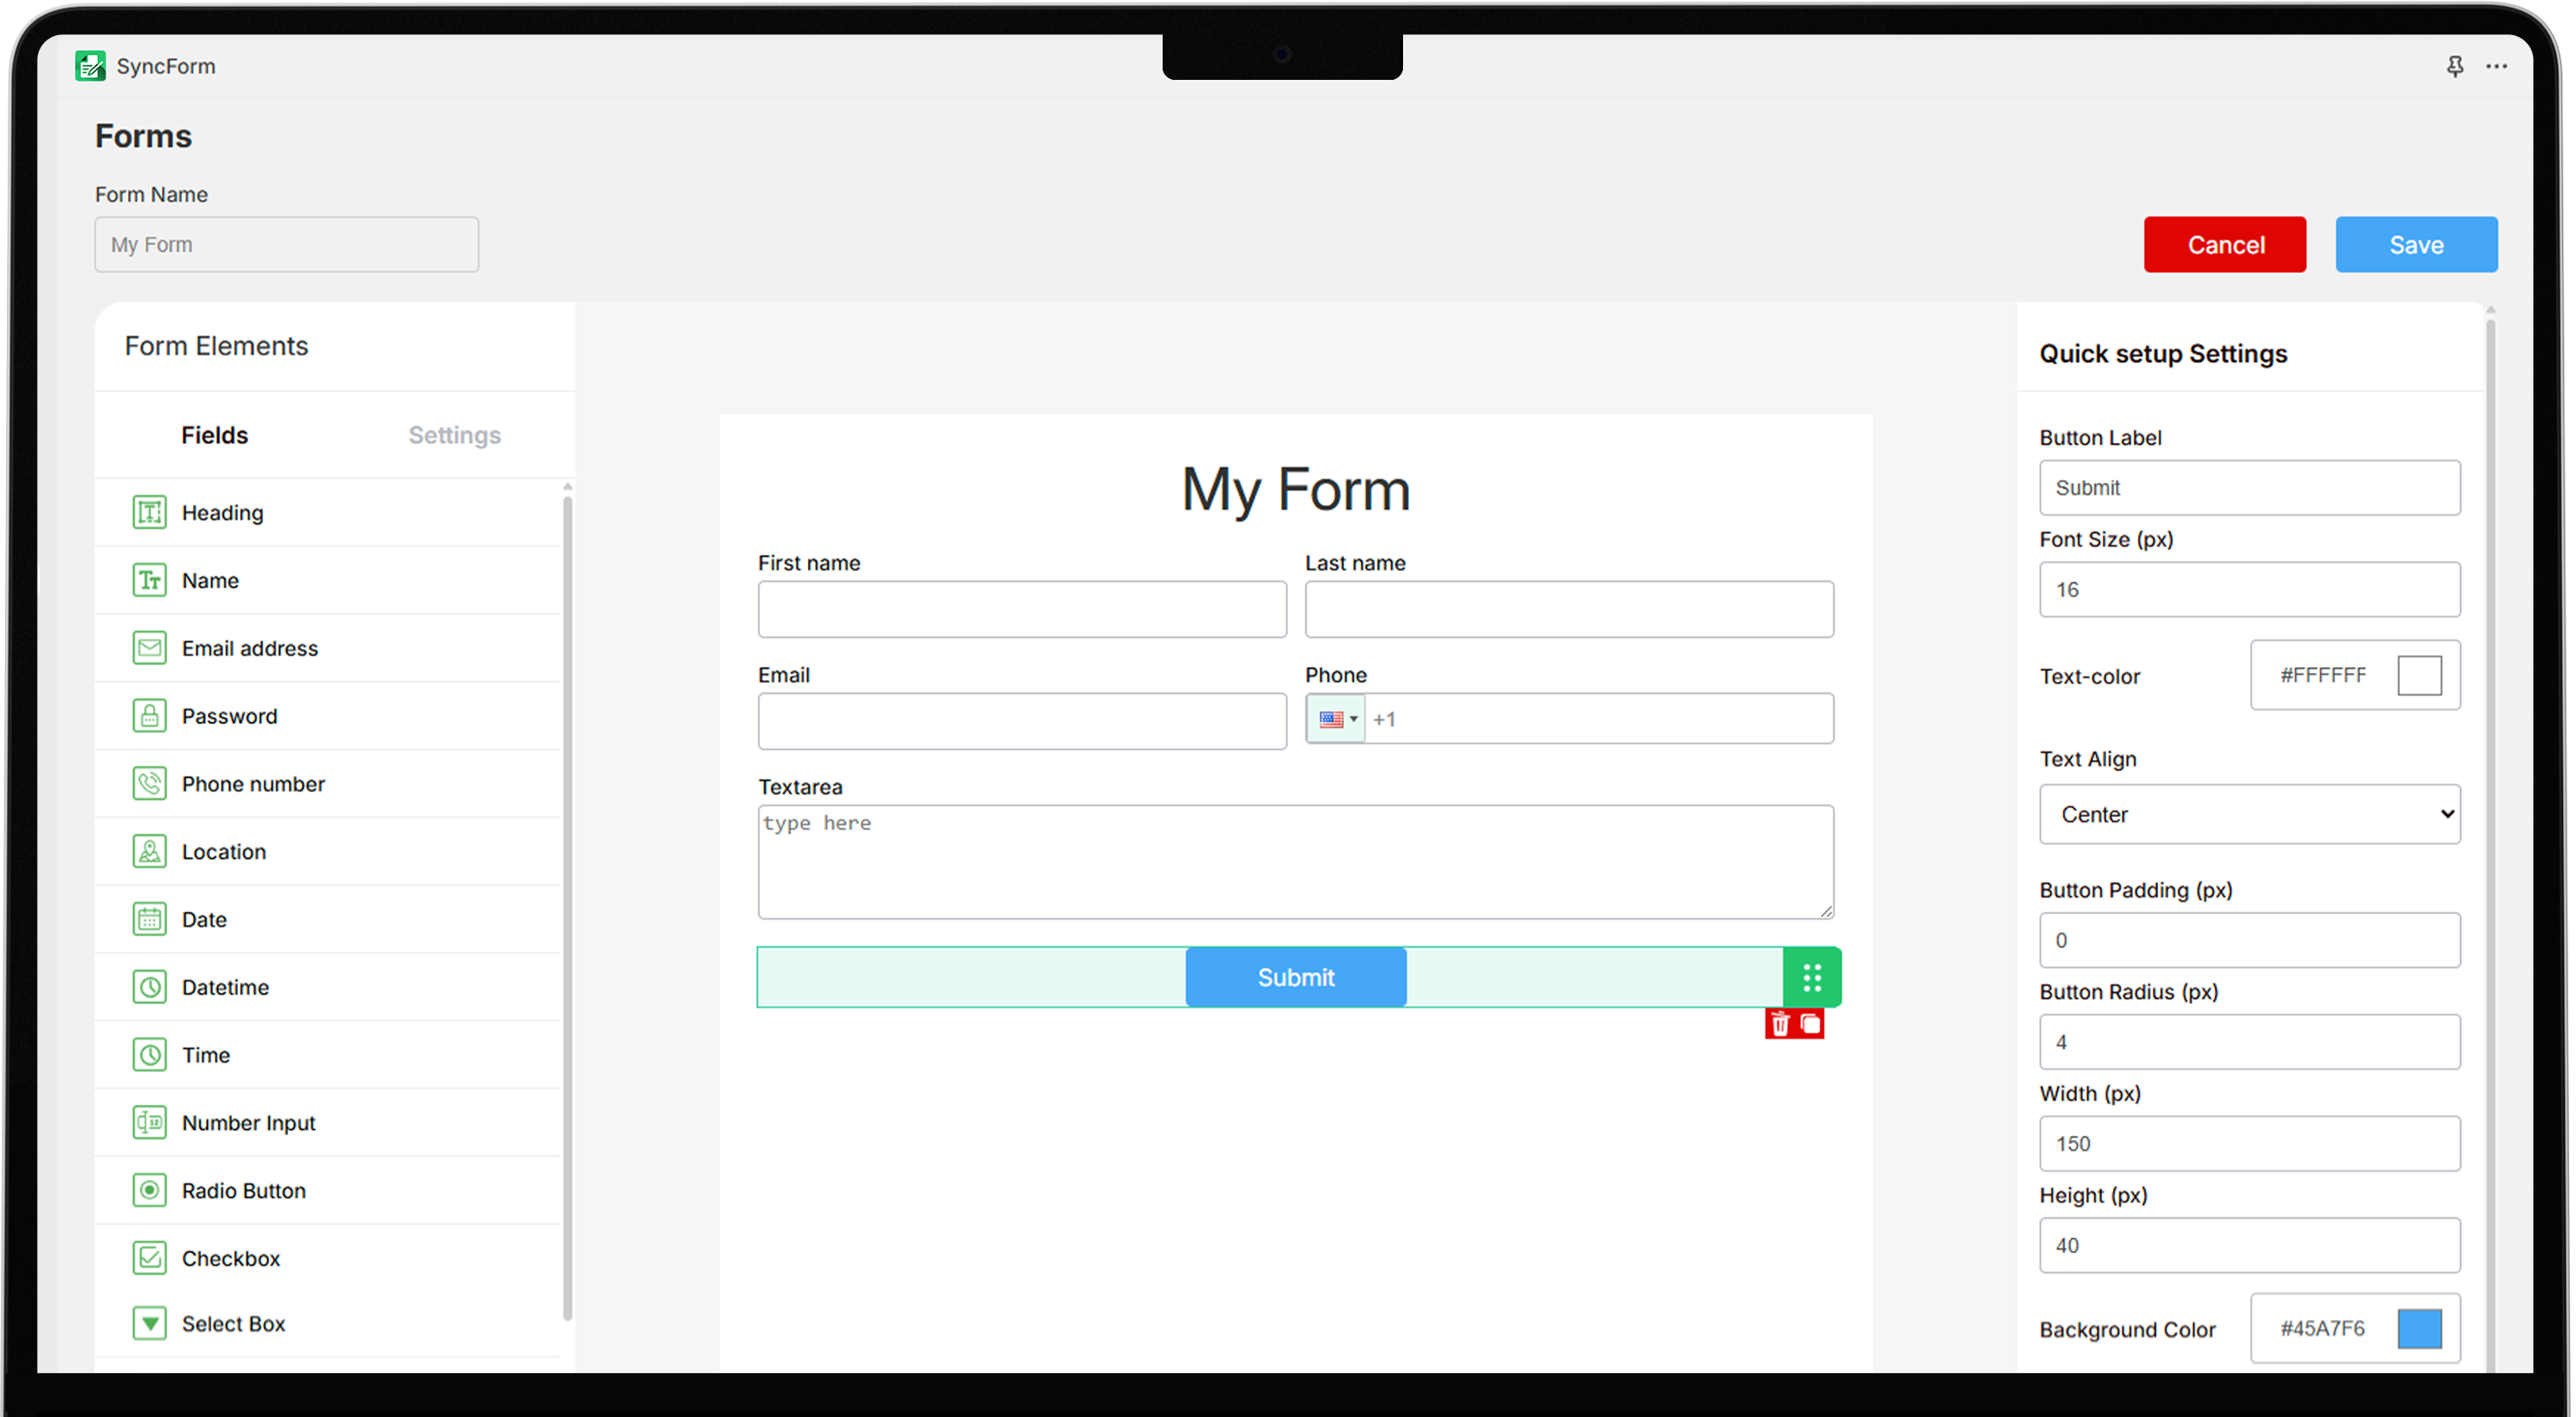
3. Create New Form
Log in to your Shopify admin dashboard and install the SyncForm app.
- Navigate to SyncForm > Forms in the left sidebar.
- Click New Form to start creating a new form.
- Enter a name for the form.
- Select and configure the necessary form elements like text fields, checkbox, file upload, dropdown and other menus.
- Customize the form appearance to match your brand.
- Apply custom CSS to modify the design form as you want.
- Click Save to publish the form.
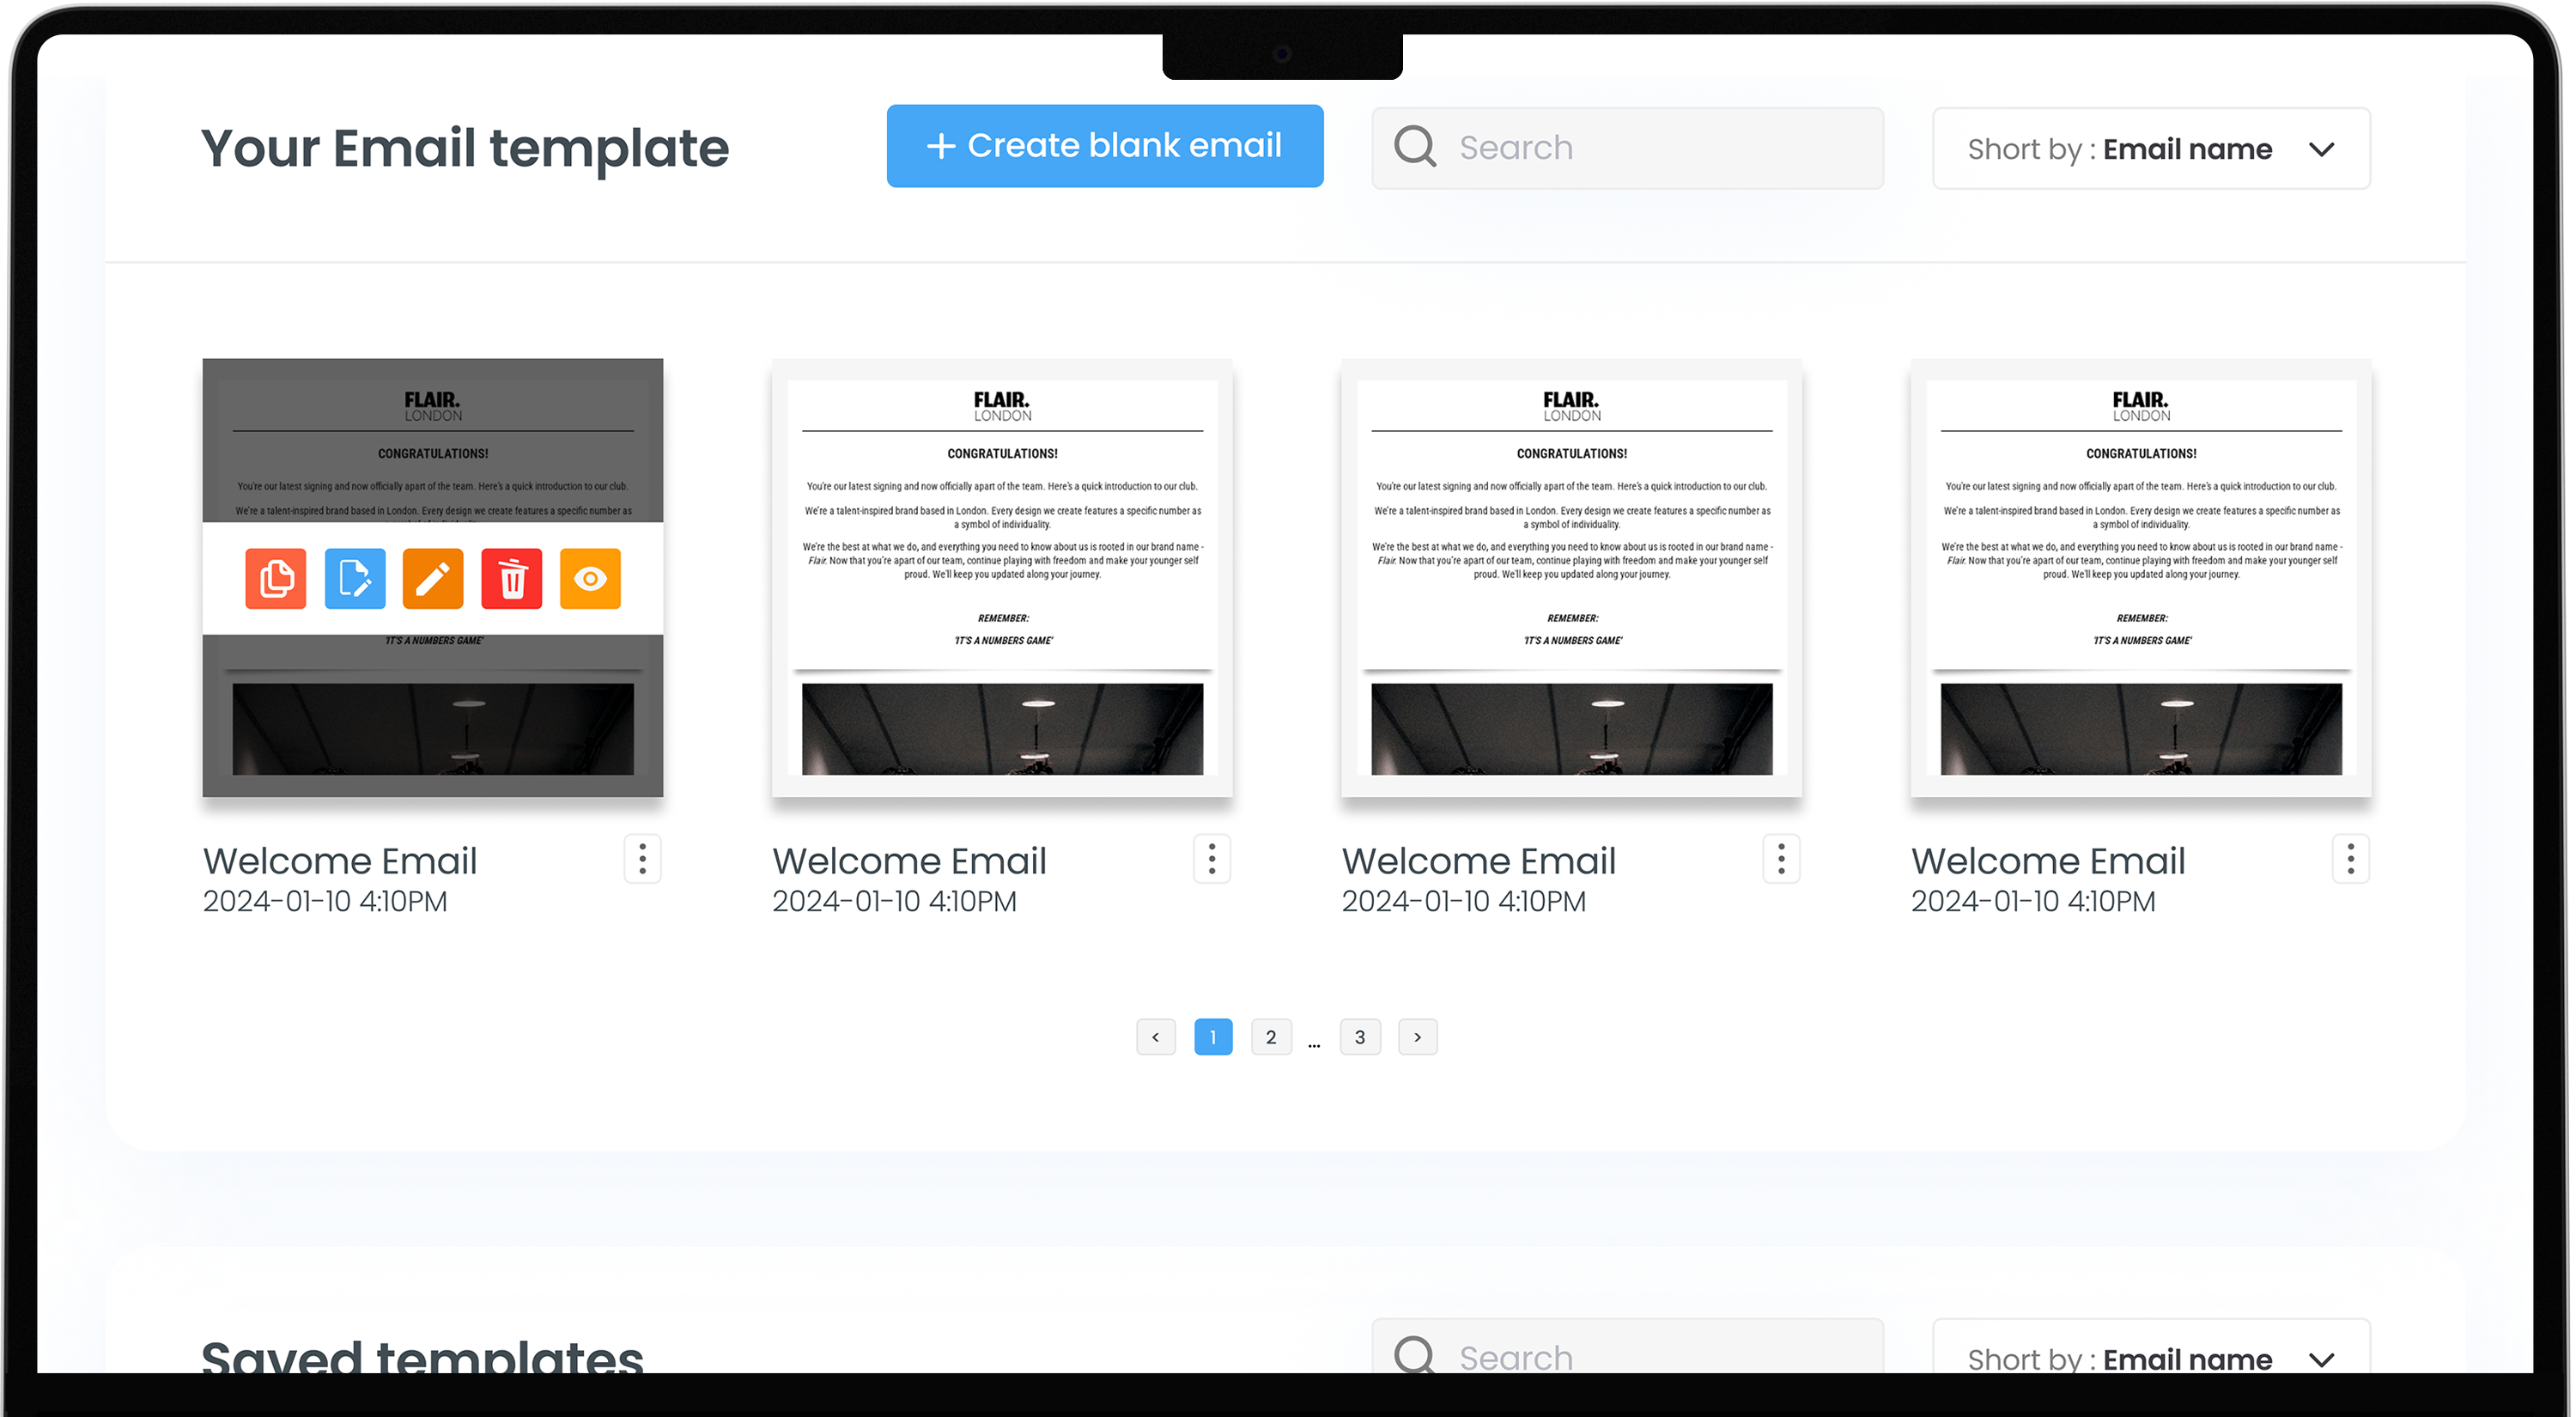
4. Configure Form Settings
After creating the form, connect your email with SyncForm to send and receive email.
- In the app dashboard, go to Settings and enter your email and app password to receive notifications.
- To integrate the template with the form, navigate to Email Template in the app menu.
- Choose a pre-built template or create a new one by clicking New Blank Template.
- Name the template.
- Select the form name you want to connect the template.
- Choose and customize the template elements as needed.
- Click on Save to apply the changes.
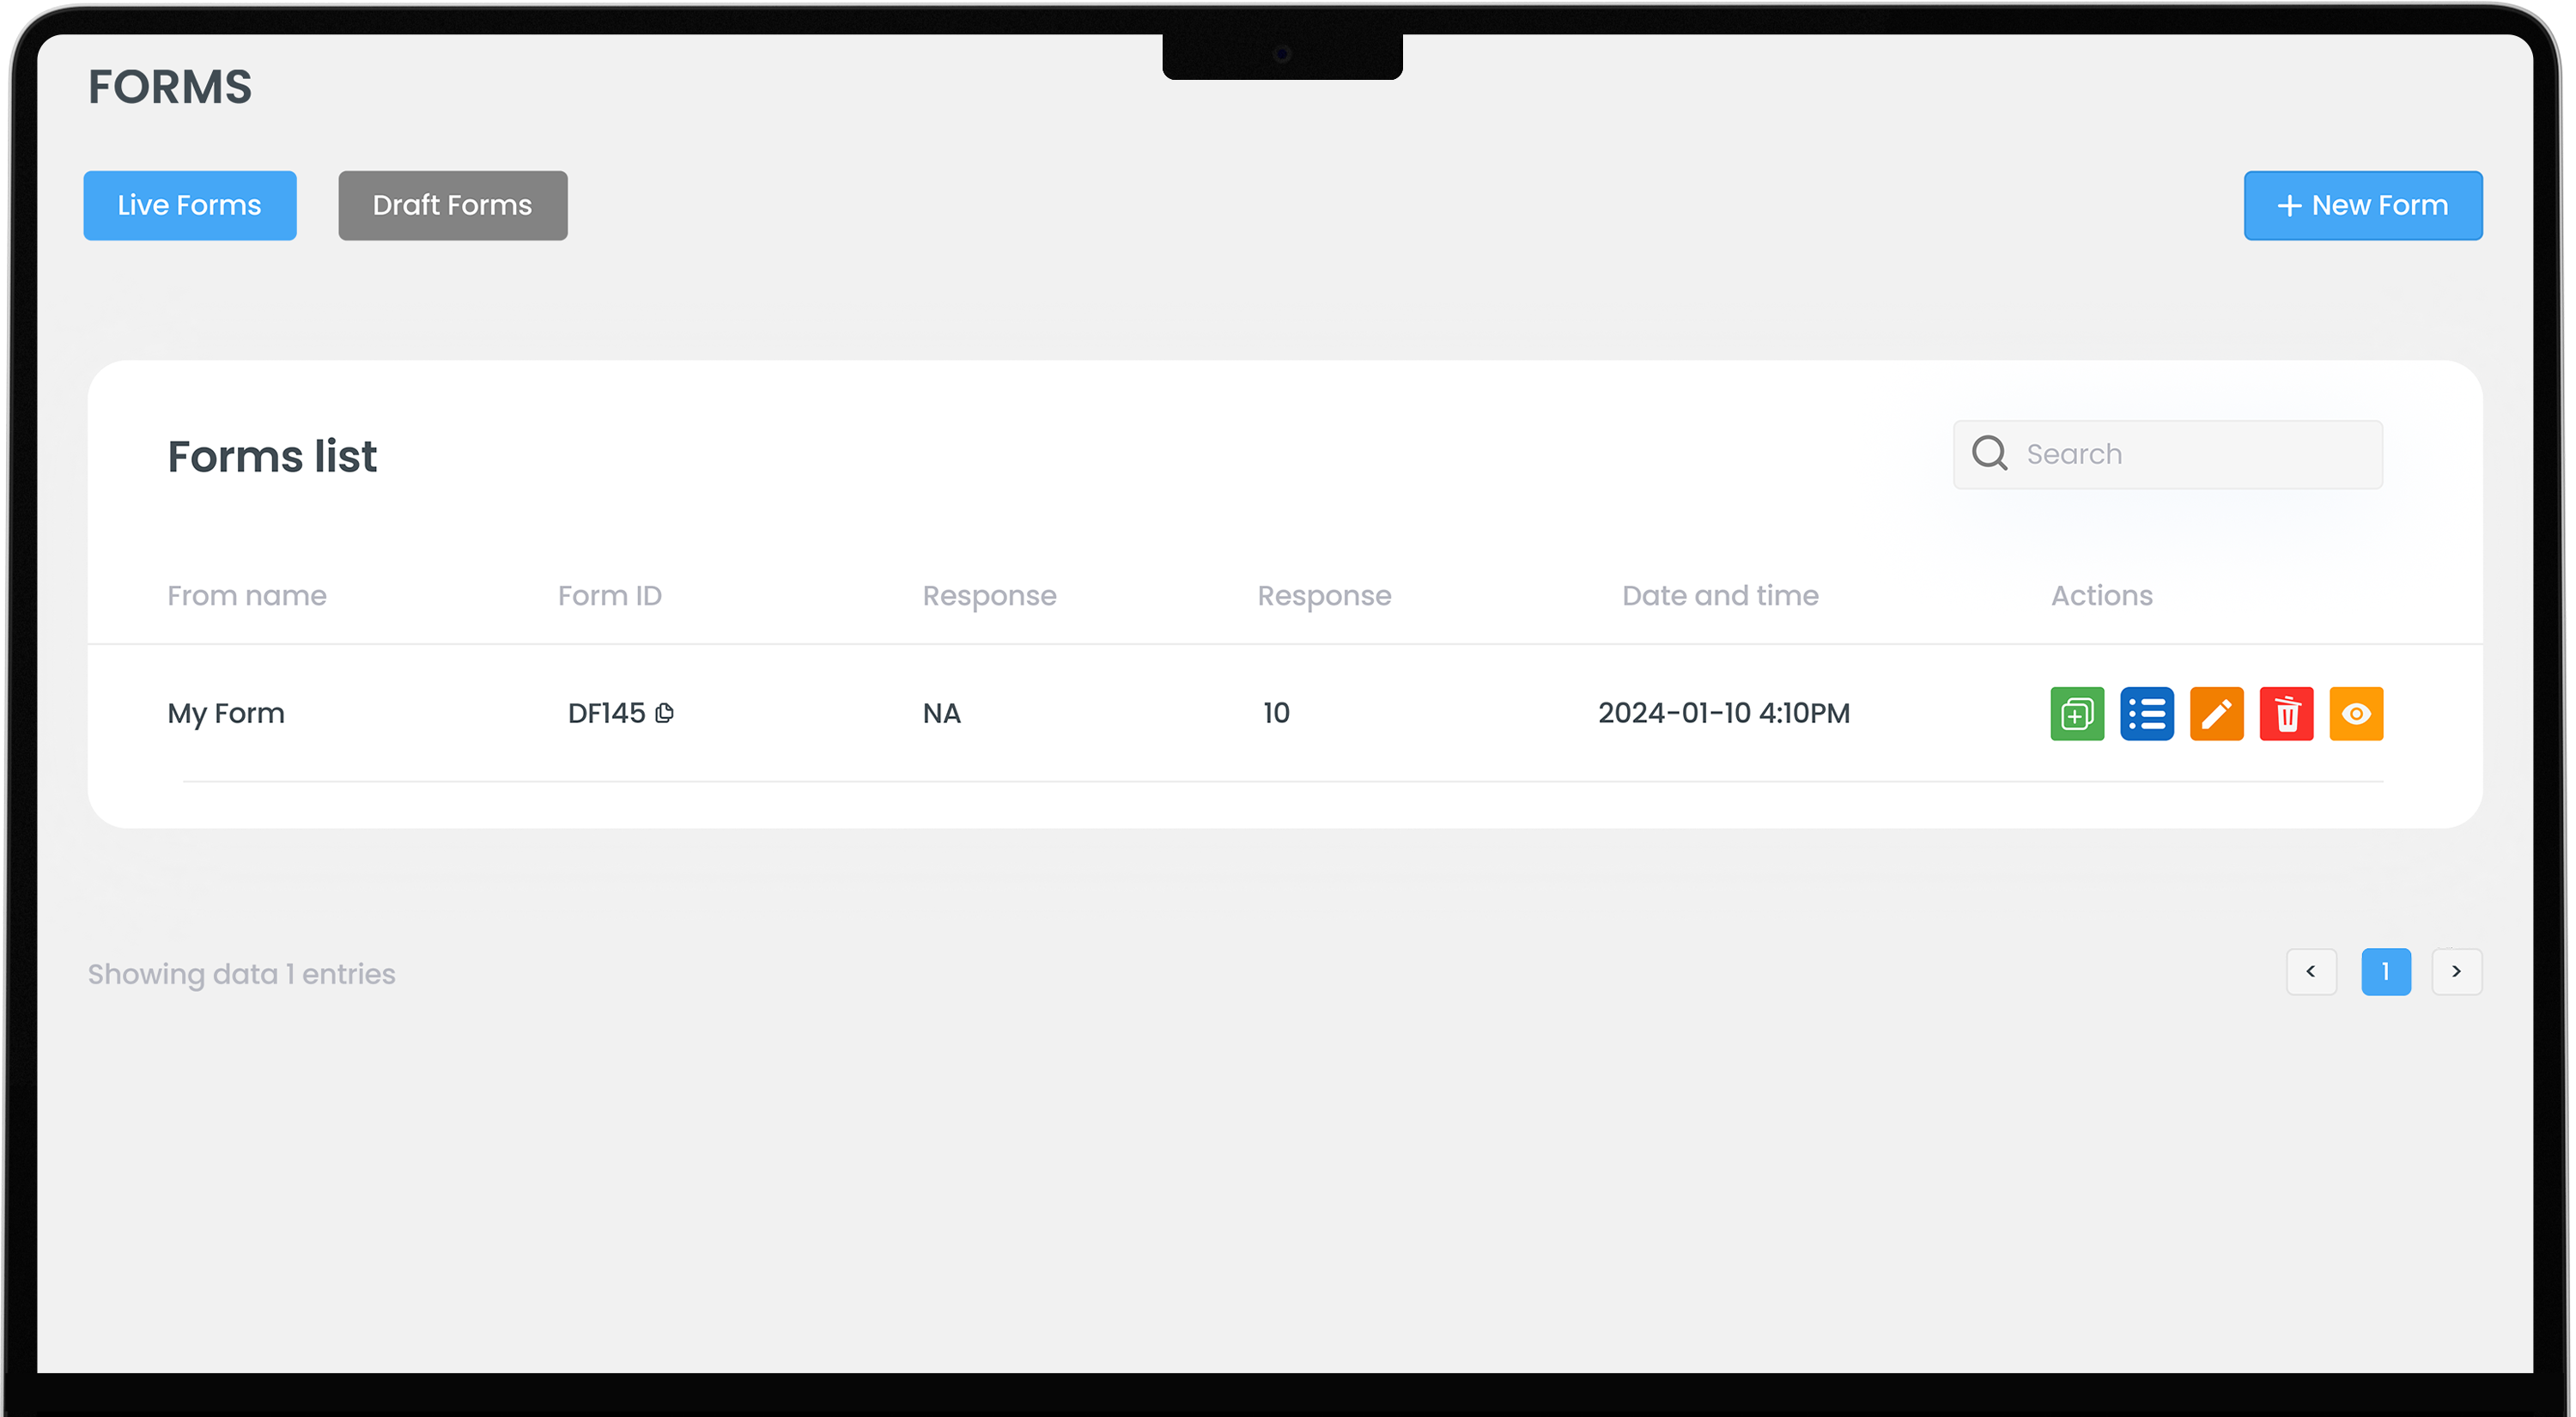
5. Publish Form
To embed the form on your store, copy the form ID of the newly created form from the Forms section.
- In the Shopify admin panel, navigate to Online Store > Themes.
- Click the Customize button next to Current theme.
- Select the page where you want to add the form.
- Click Add section in template page and select App, enable the SyncForm app.
- On the right side app menu appears, locate the Form ID column.
- Paste the copied code into the field.
- Click save to embed the form on this page.
6. Analyze Response
In the SyncForm dashboard, navigate to the Customer section to monitor responses to gain insights and optimize performance.
Select the form to view user responses. You can also download the CSV file of submitted form data for further analysis.
Best Practices for Creating Form in Form Builder?
A well-designed form improves completion rates, reduces user frustration, and ensures that collected data is accurate. Key considerations include layout, mobile friendly, and data handling. These practices increase form completion rates and user satisfaction.
Keep Forms Simple and User-Friendly
A form should be brief, ask only for necessary information. Each field should be clearly labelled to guide users to complete form, reduce errors. Add required fields to show mandatory fields to avoid confusion.
Mobile Responsive
A responsive design ensures the form functions properly on various screen sizes, making it accessible on any device. Single column layout for mobile devices to improve readability. Avoid too much scrolling and ensure touch friendly input fields and fields have enough space to prevent accidental clicks.
Progress Indicators
A progress bar helps users understand the remaining steps to complete. A clear step-by-step percentage completion bar visually show progress, keeps the users engaged. These practices improve user experience and reduce form abandon rates.
Confirmation
Show a confirmation message to the users that their submission was successful. Send an email confirmation with submitted details. This allows users to edit or review their submission, ensures accuracy and improves user satisfaction.