

How to Add Form Builder App on Shopify Store?
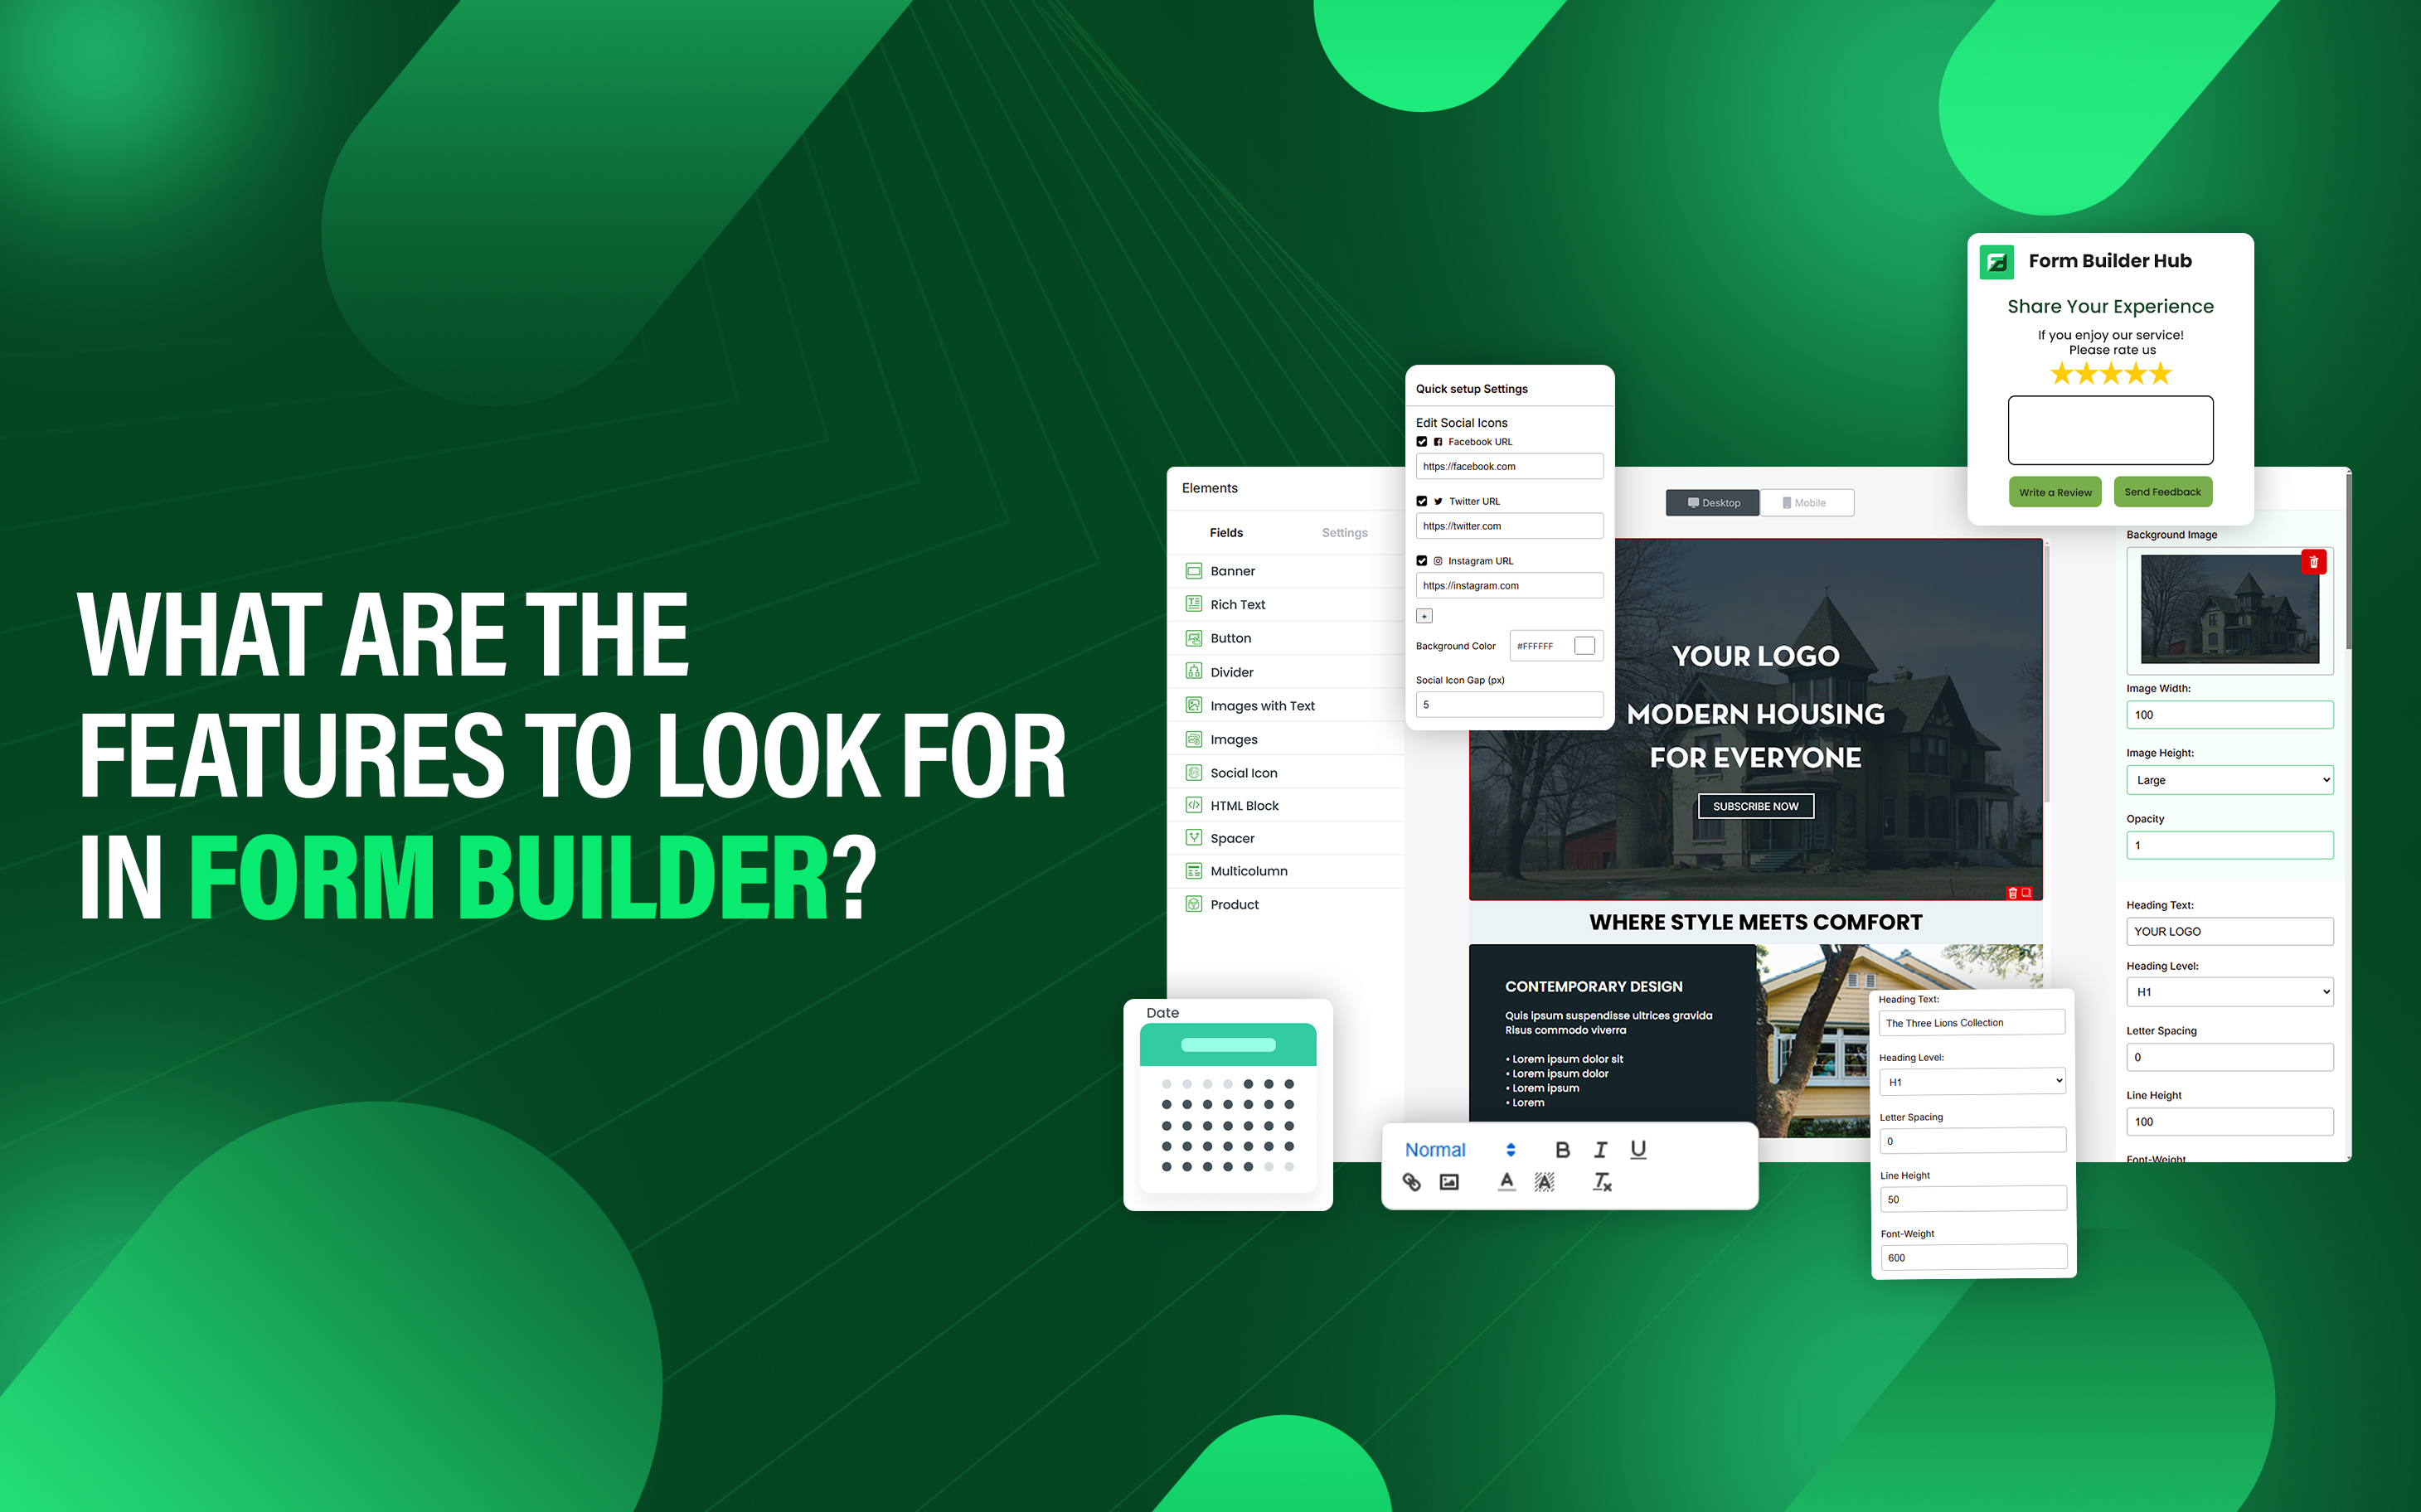
Form builder apps allow Shopify store owners to create and manage custom forms to collect the customer feedback, email address, and other related information. Shopify does not have a built-in form builder, so merchants rely on third-party apps from the Shopify App Store. These apps provide drag-and-drop functionality, customizable fields, and integrations with email marketing tools.
Using a form builder app enhances user experience and streamlines communication between merchants and customers. Many apps also support conditional logic, file uploads, and multi-step forms, making them versatile for different business needs. Shopify form builder apps provide an easy way to design and integrate forms without requiring coding knowledge, making them accessible for users of all experience levels. Using form builders enhance customer engagement, streamline data collection, and improve overall store functionality.
- Choose and Install Form Builder App
- Configure the Form
- Embed the Form into Store
- Set up Notifications
- Automate Responses
- Test the Form
- Monitor Form Submission
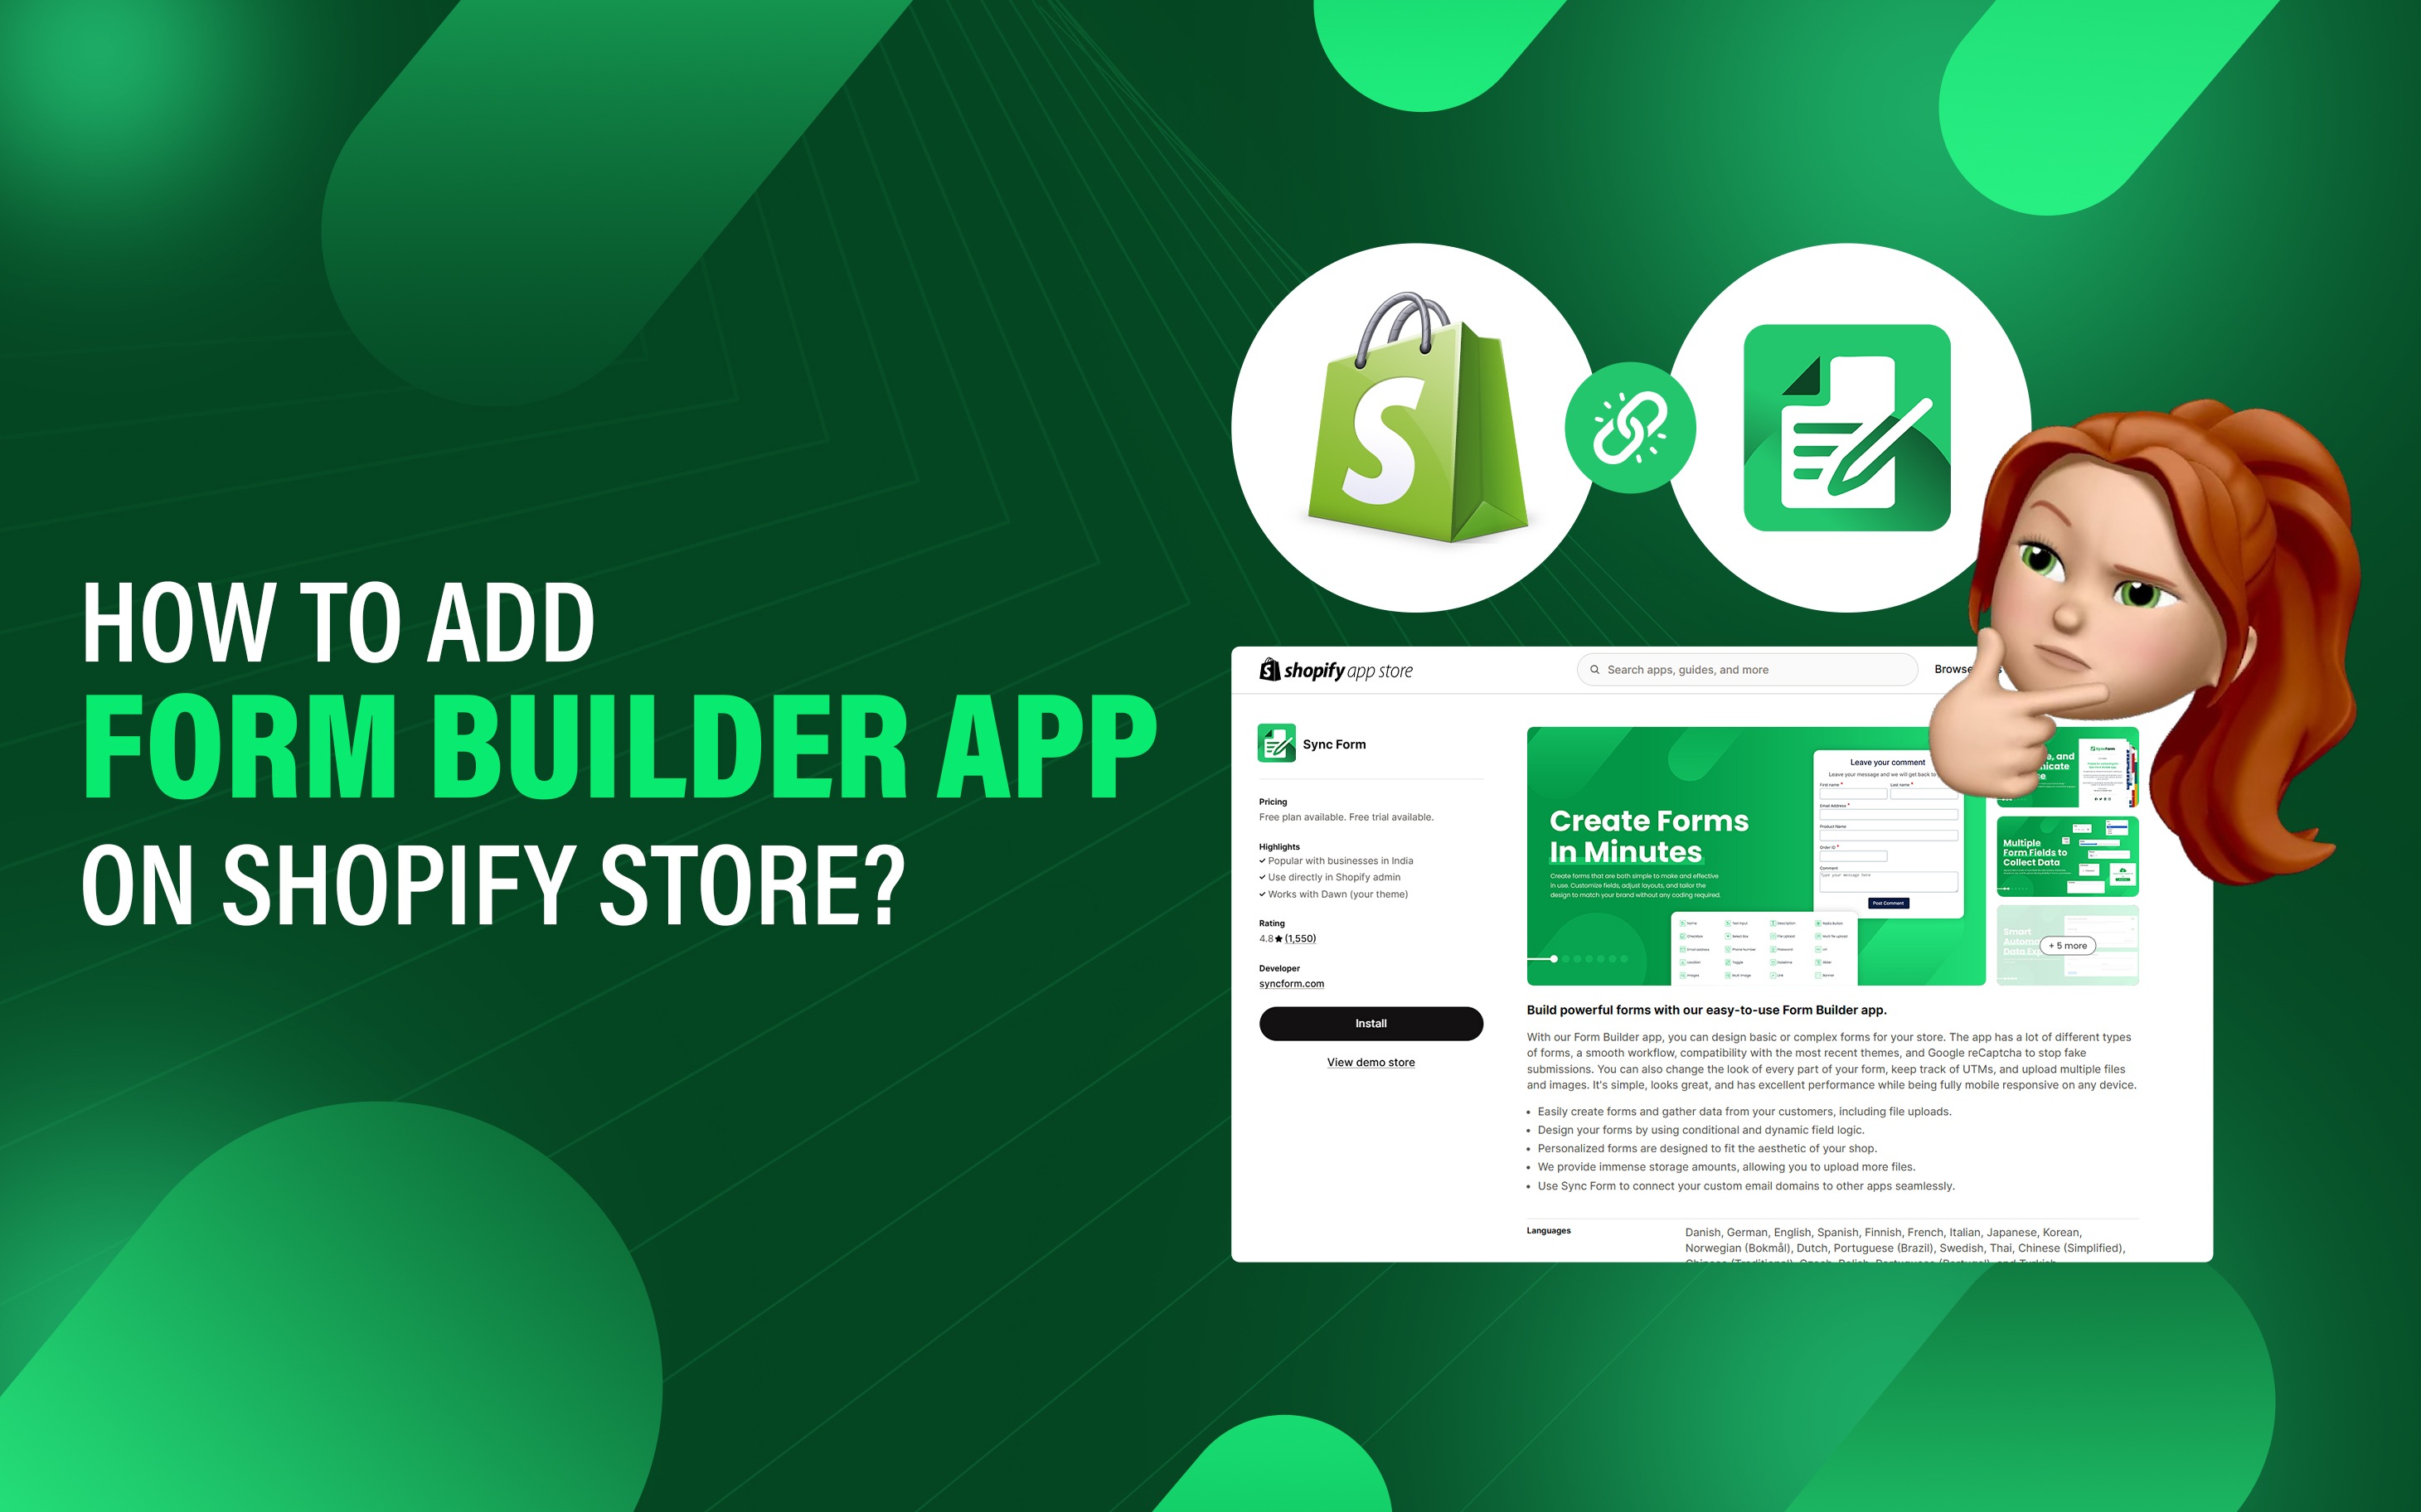
1. Choose and Install Form Builder App
With more than 8000+ apps in Shopify app store, selecting the right form builder app depends on your specific needs, customization, integration, and user-friendly design. SyncForm is a recommended option, offering an easy form creation interface and various customization features.
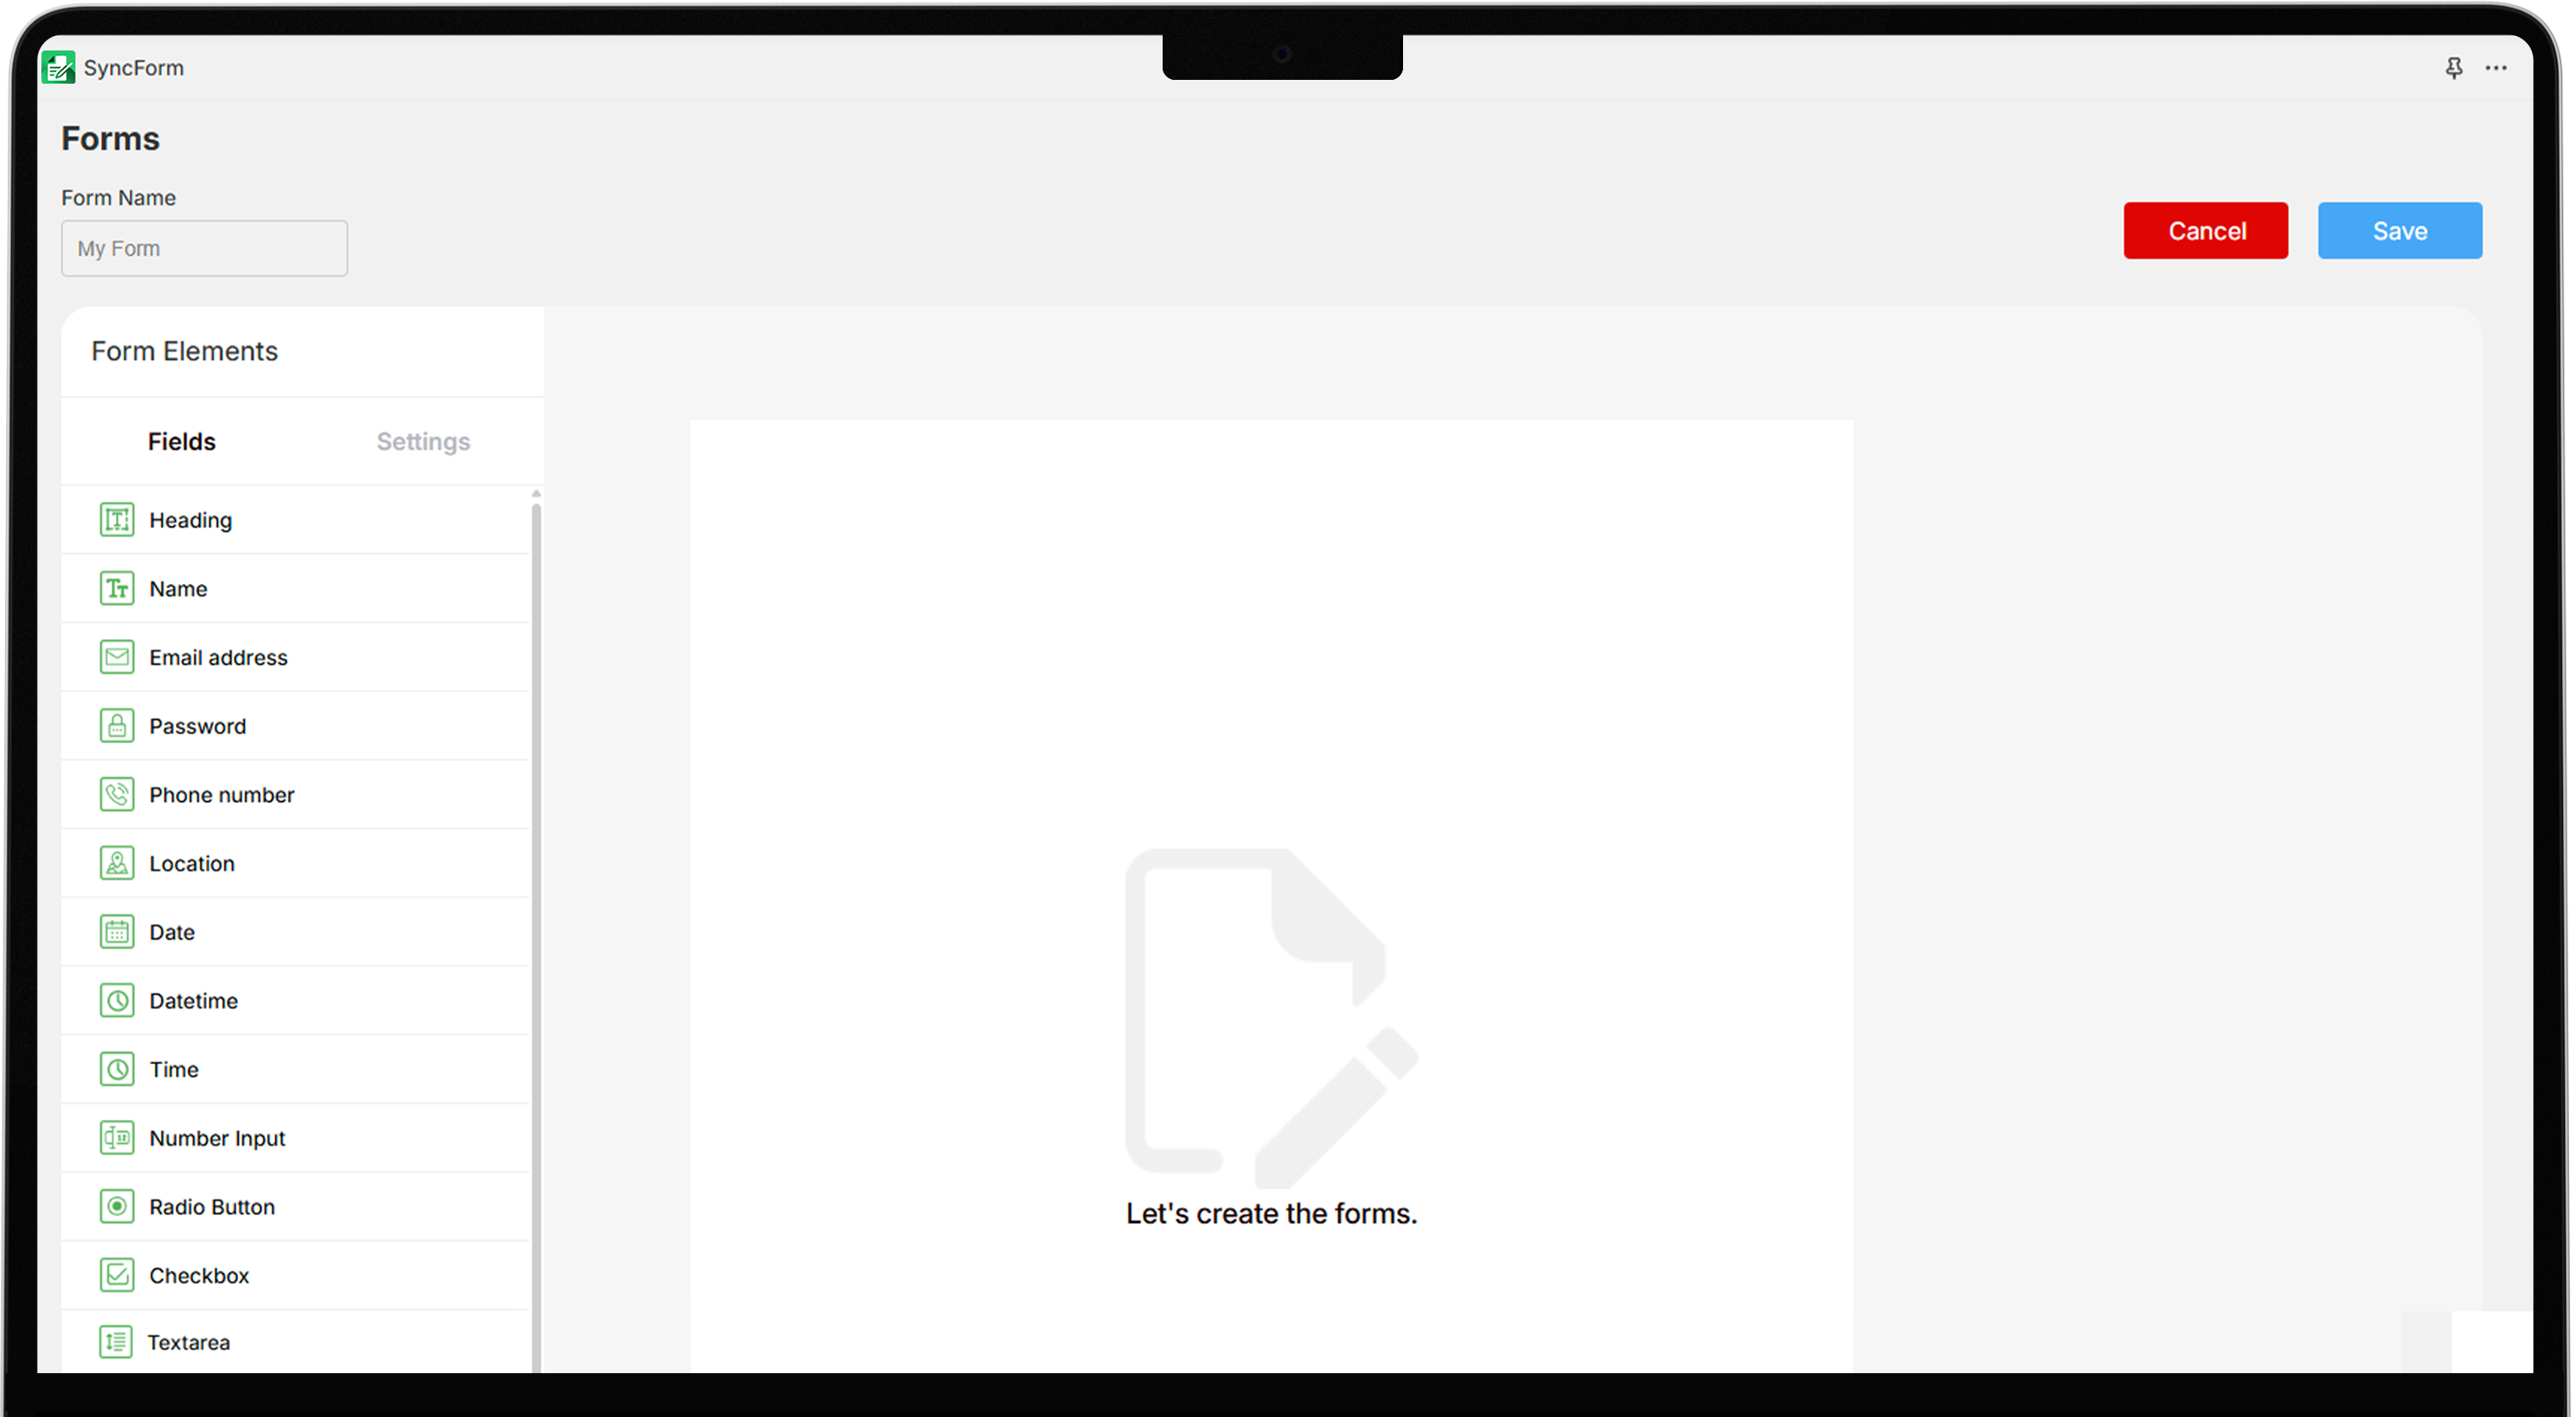
2. Configure the Form
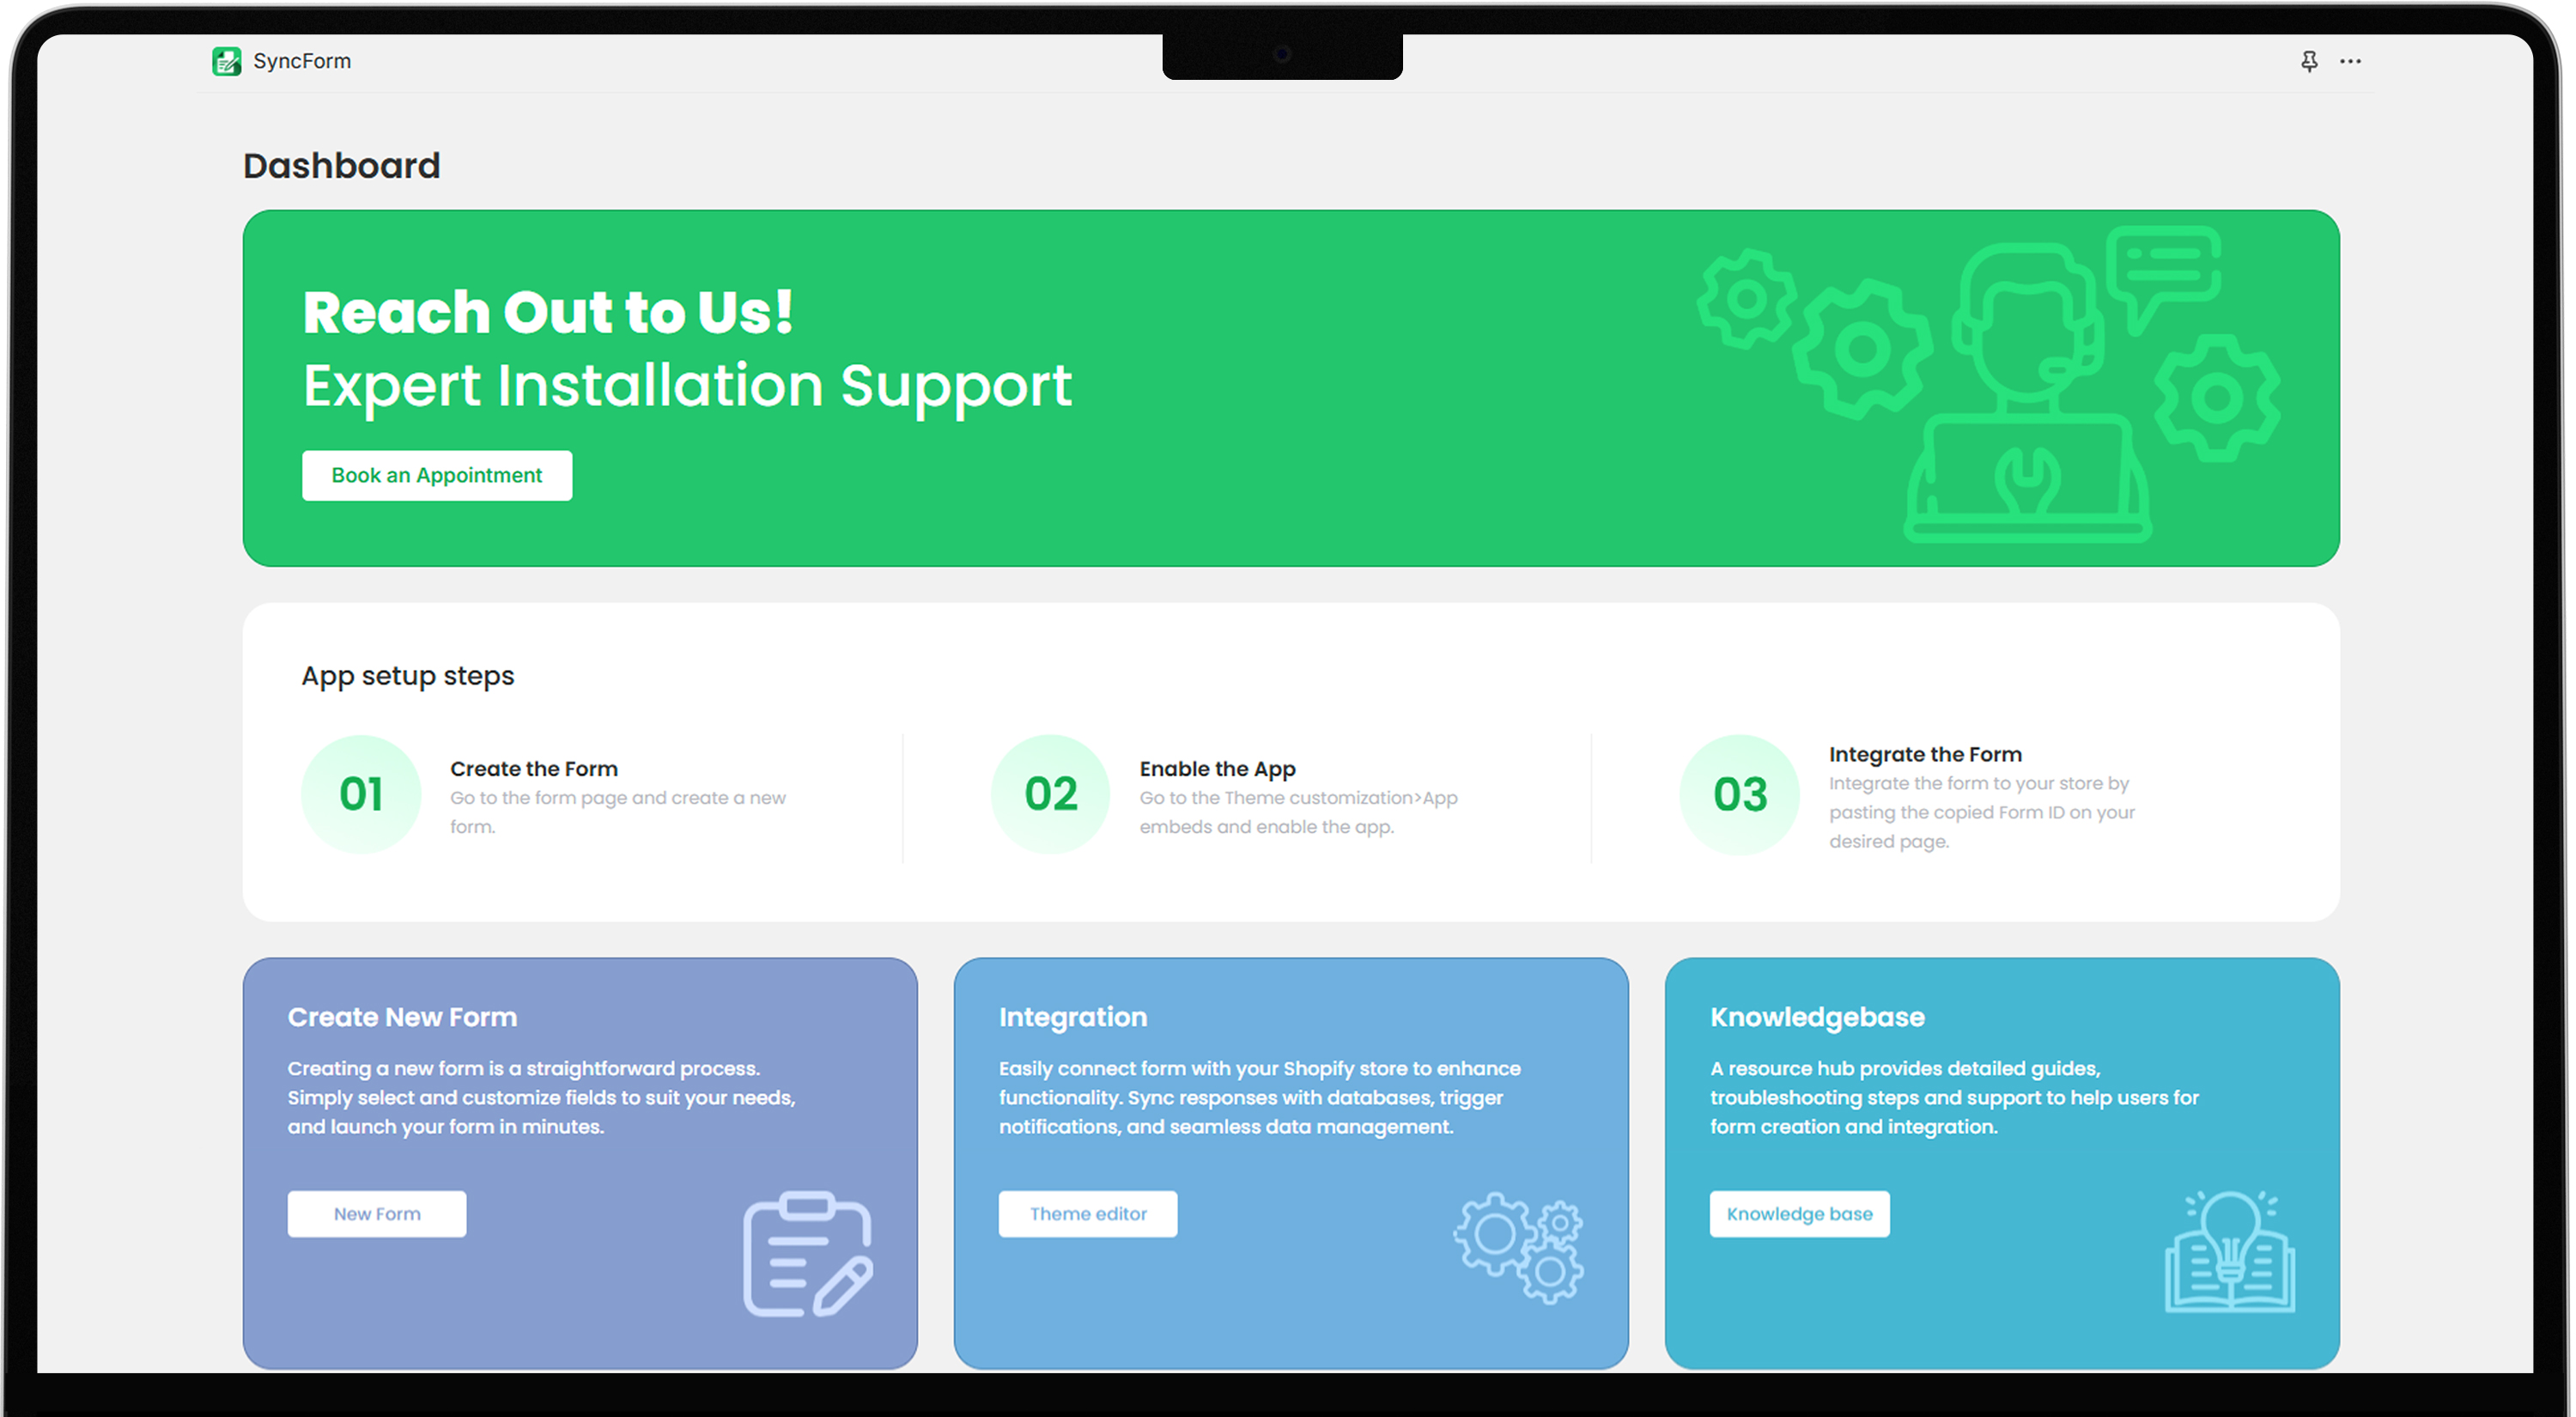
- After installing the app, access the app dashboard from the Shopify admin panel.
- Navigate to SyncForm>Form, Click on New Form on the top right side of the dashboard.
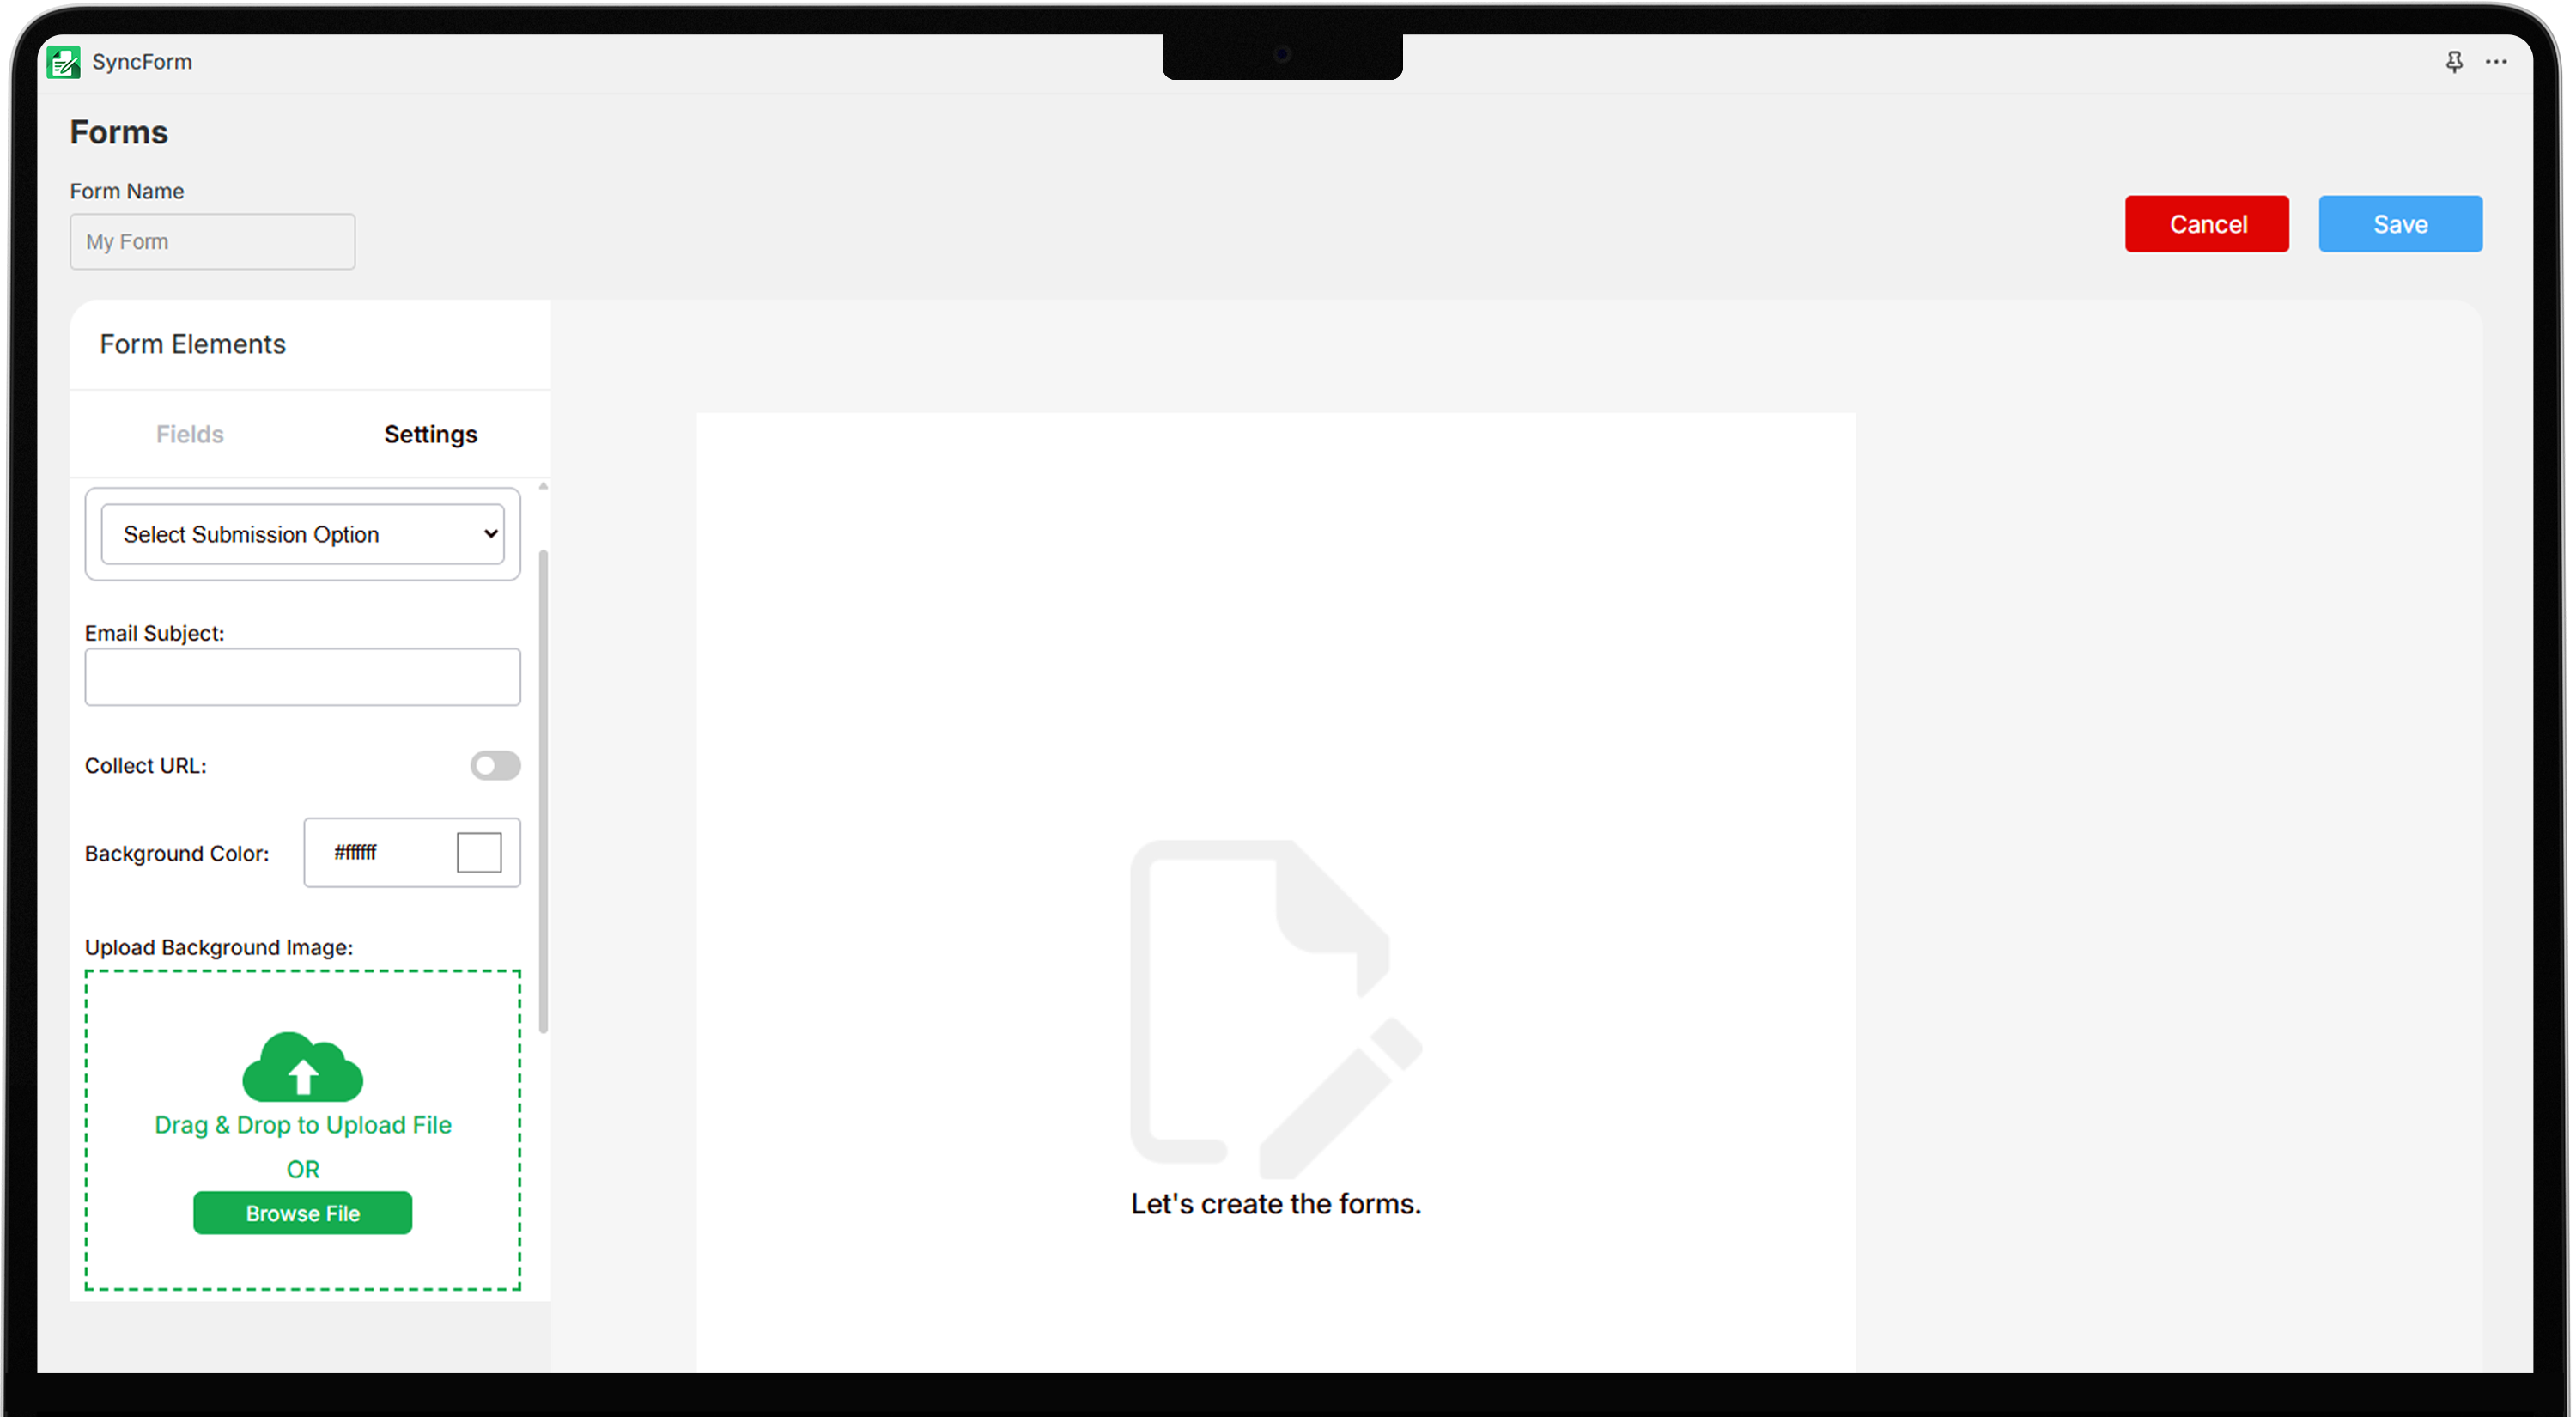
- Give the form name and use the drag-and-drop feature to design the form. Customize the form by adding fields, background style, button text, and layout as needed.
- Set the page that appears after submission like Thank you, redirect to another page, and another submission form.
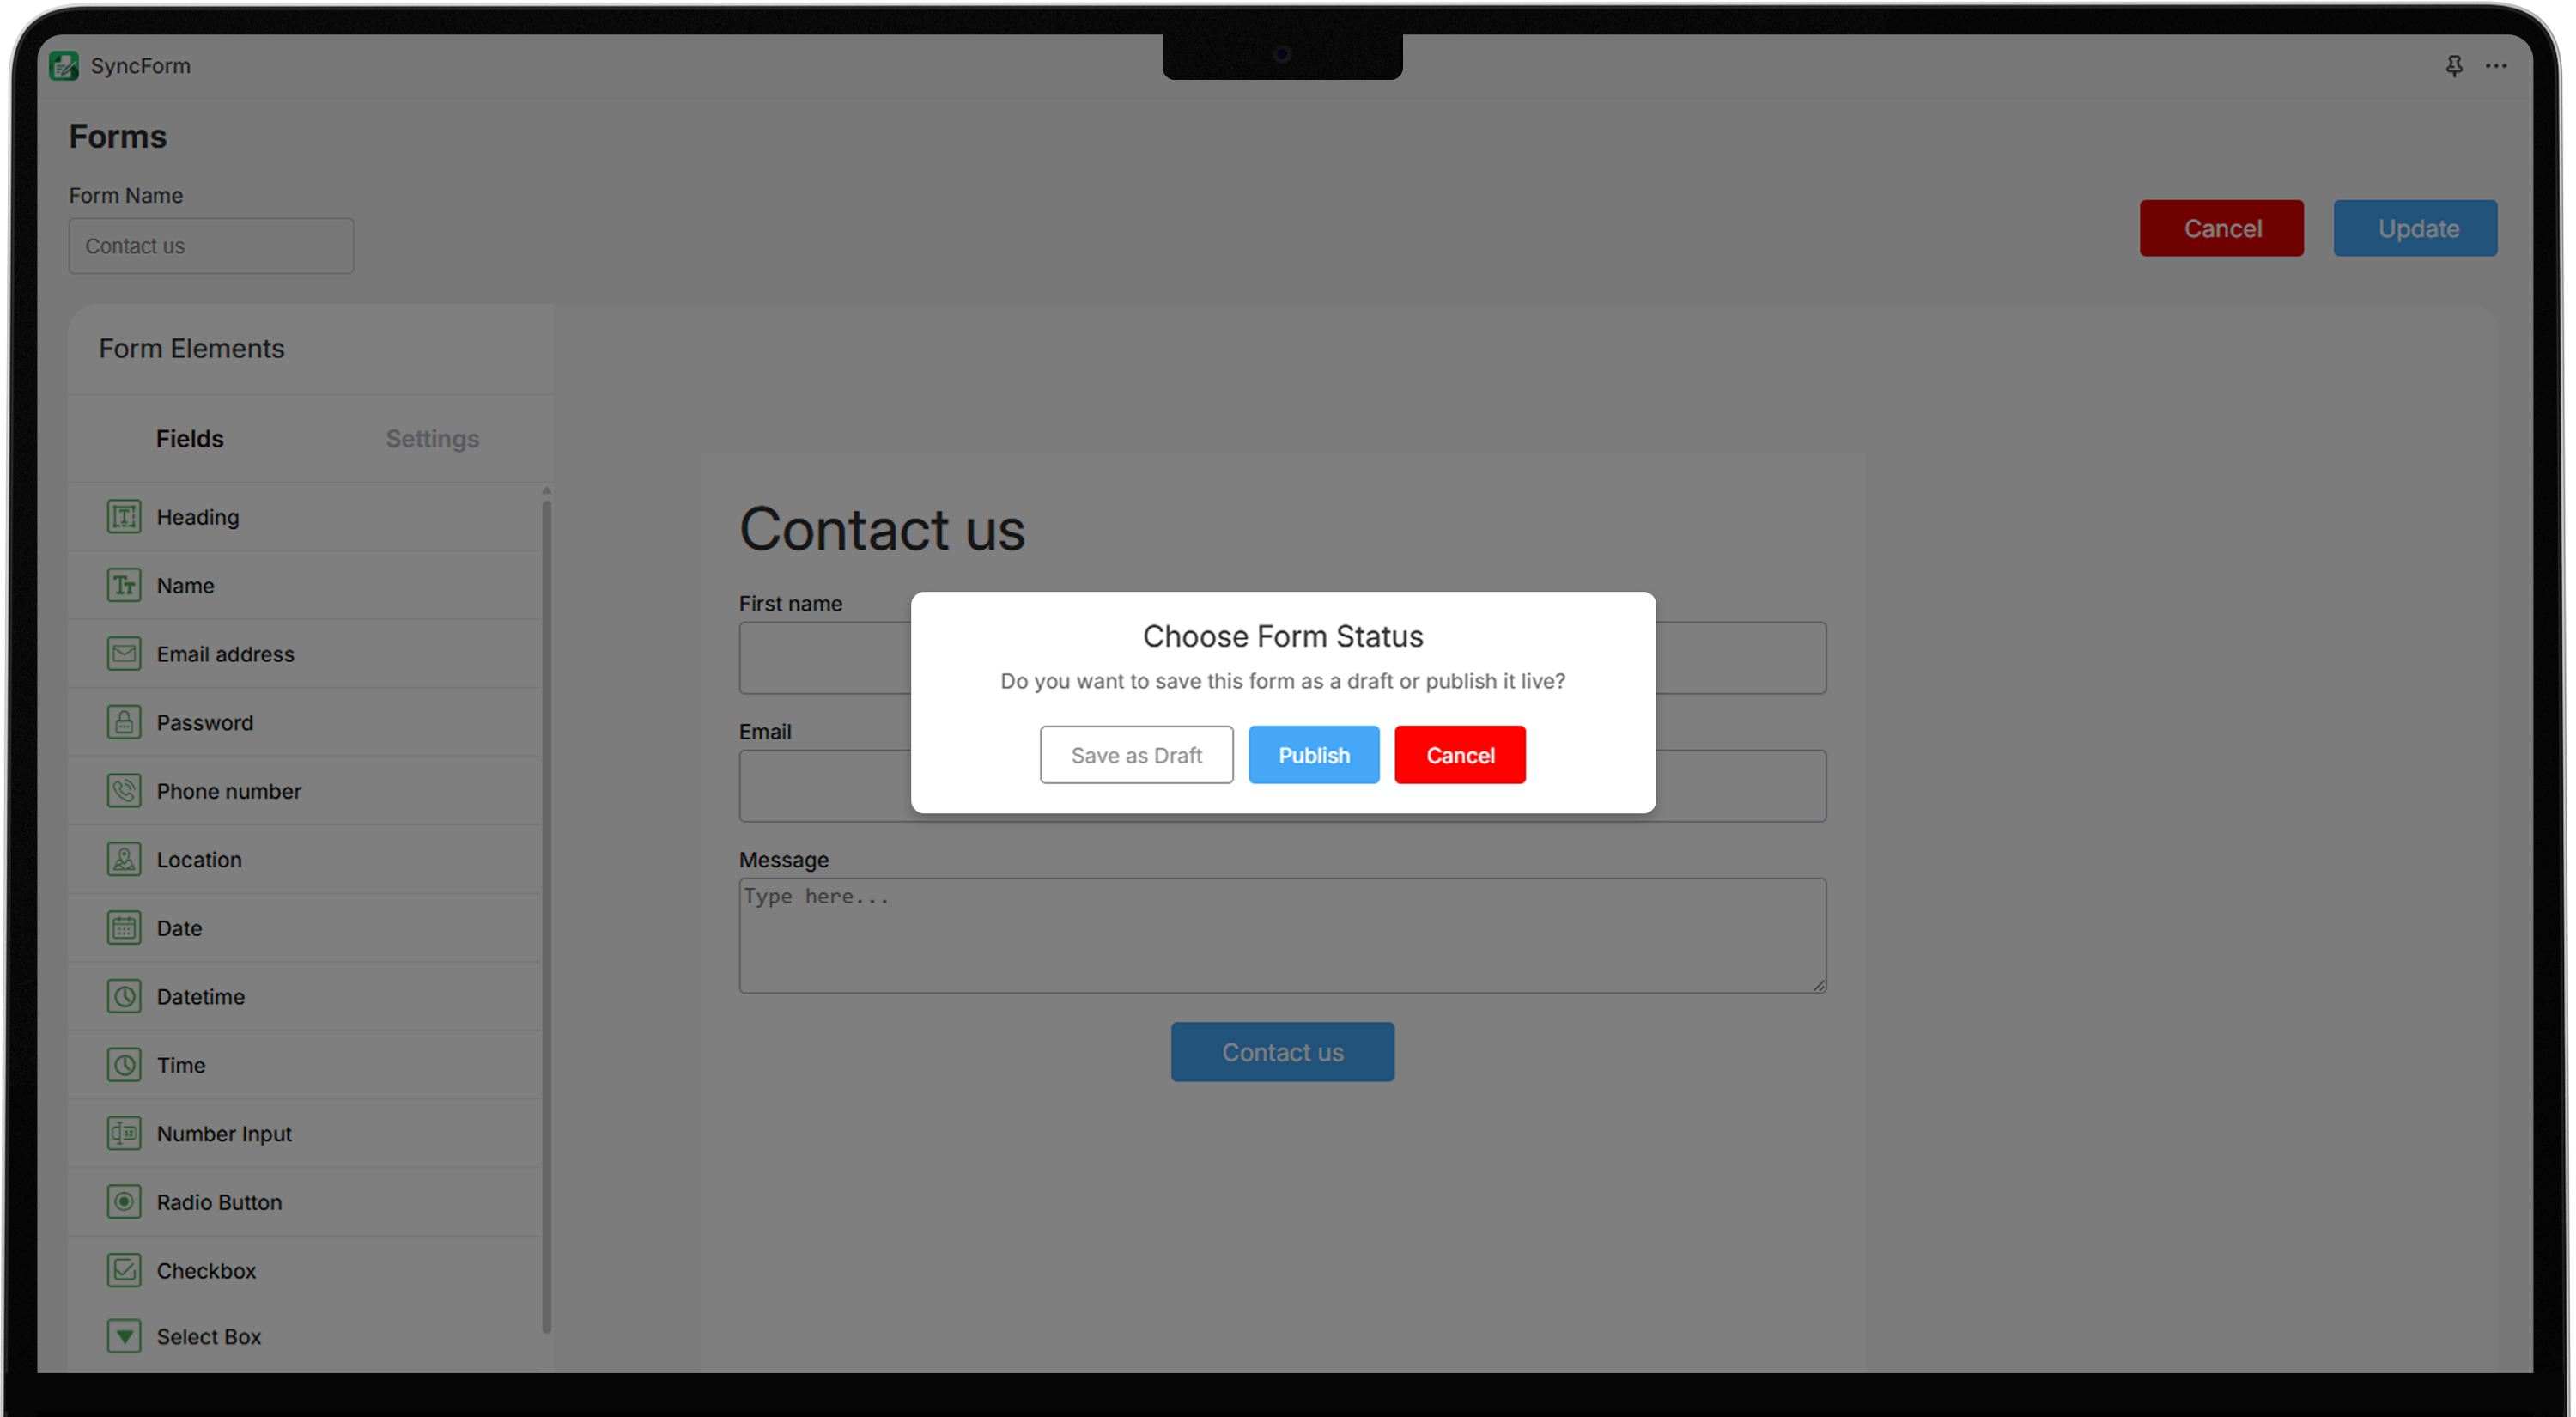
- Click Save & Publish the form.
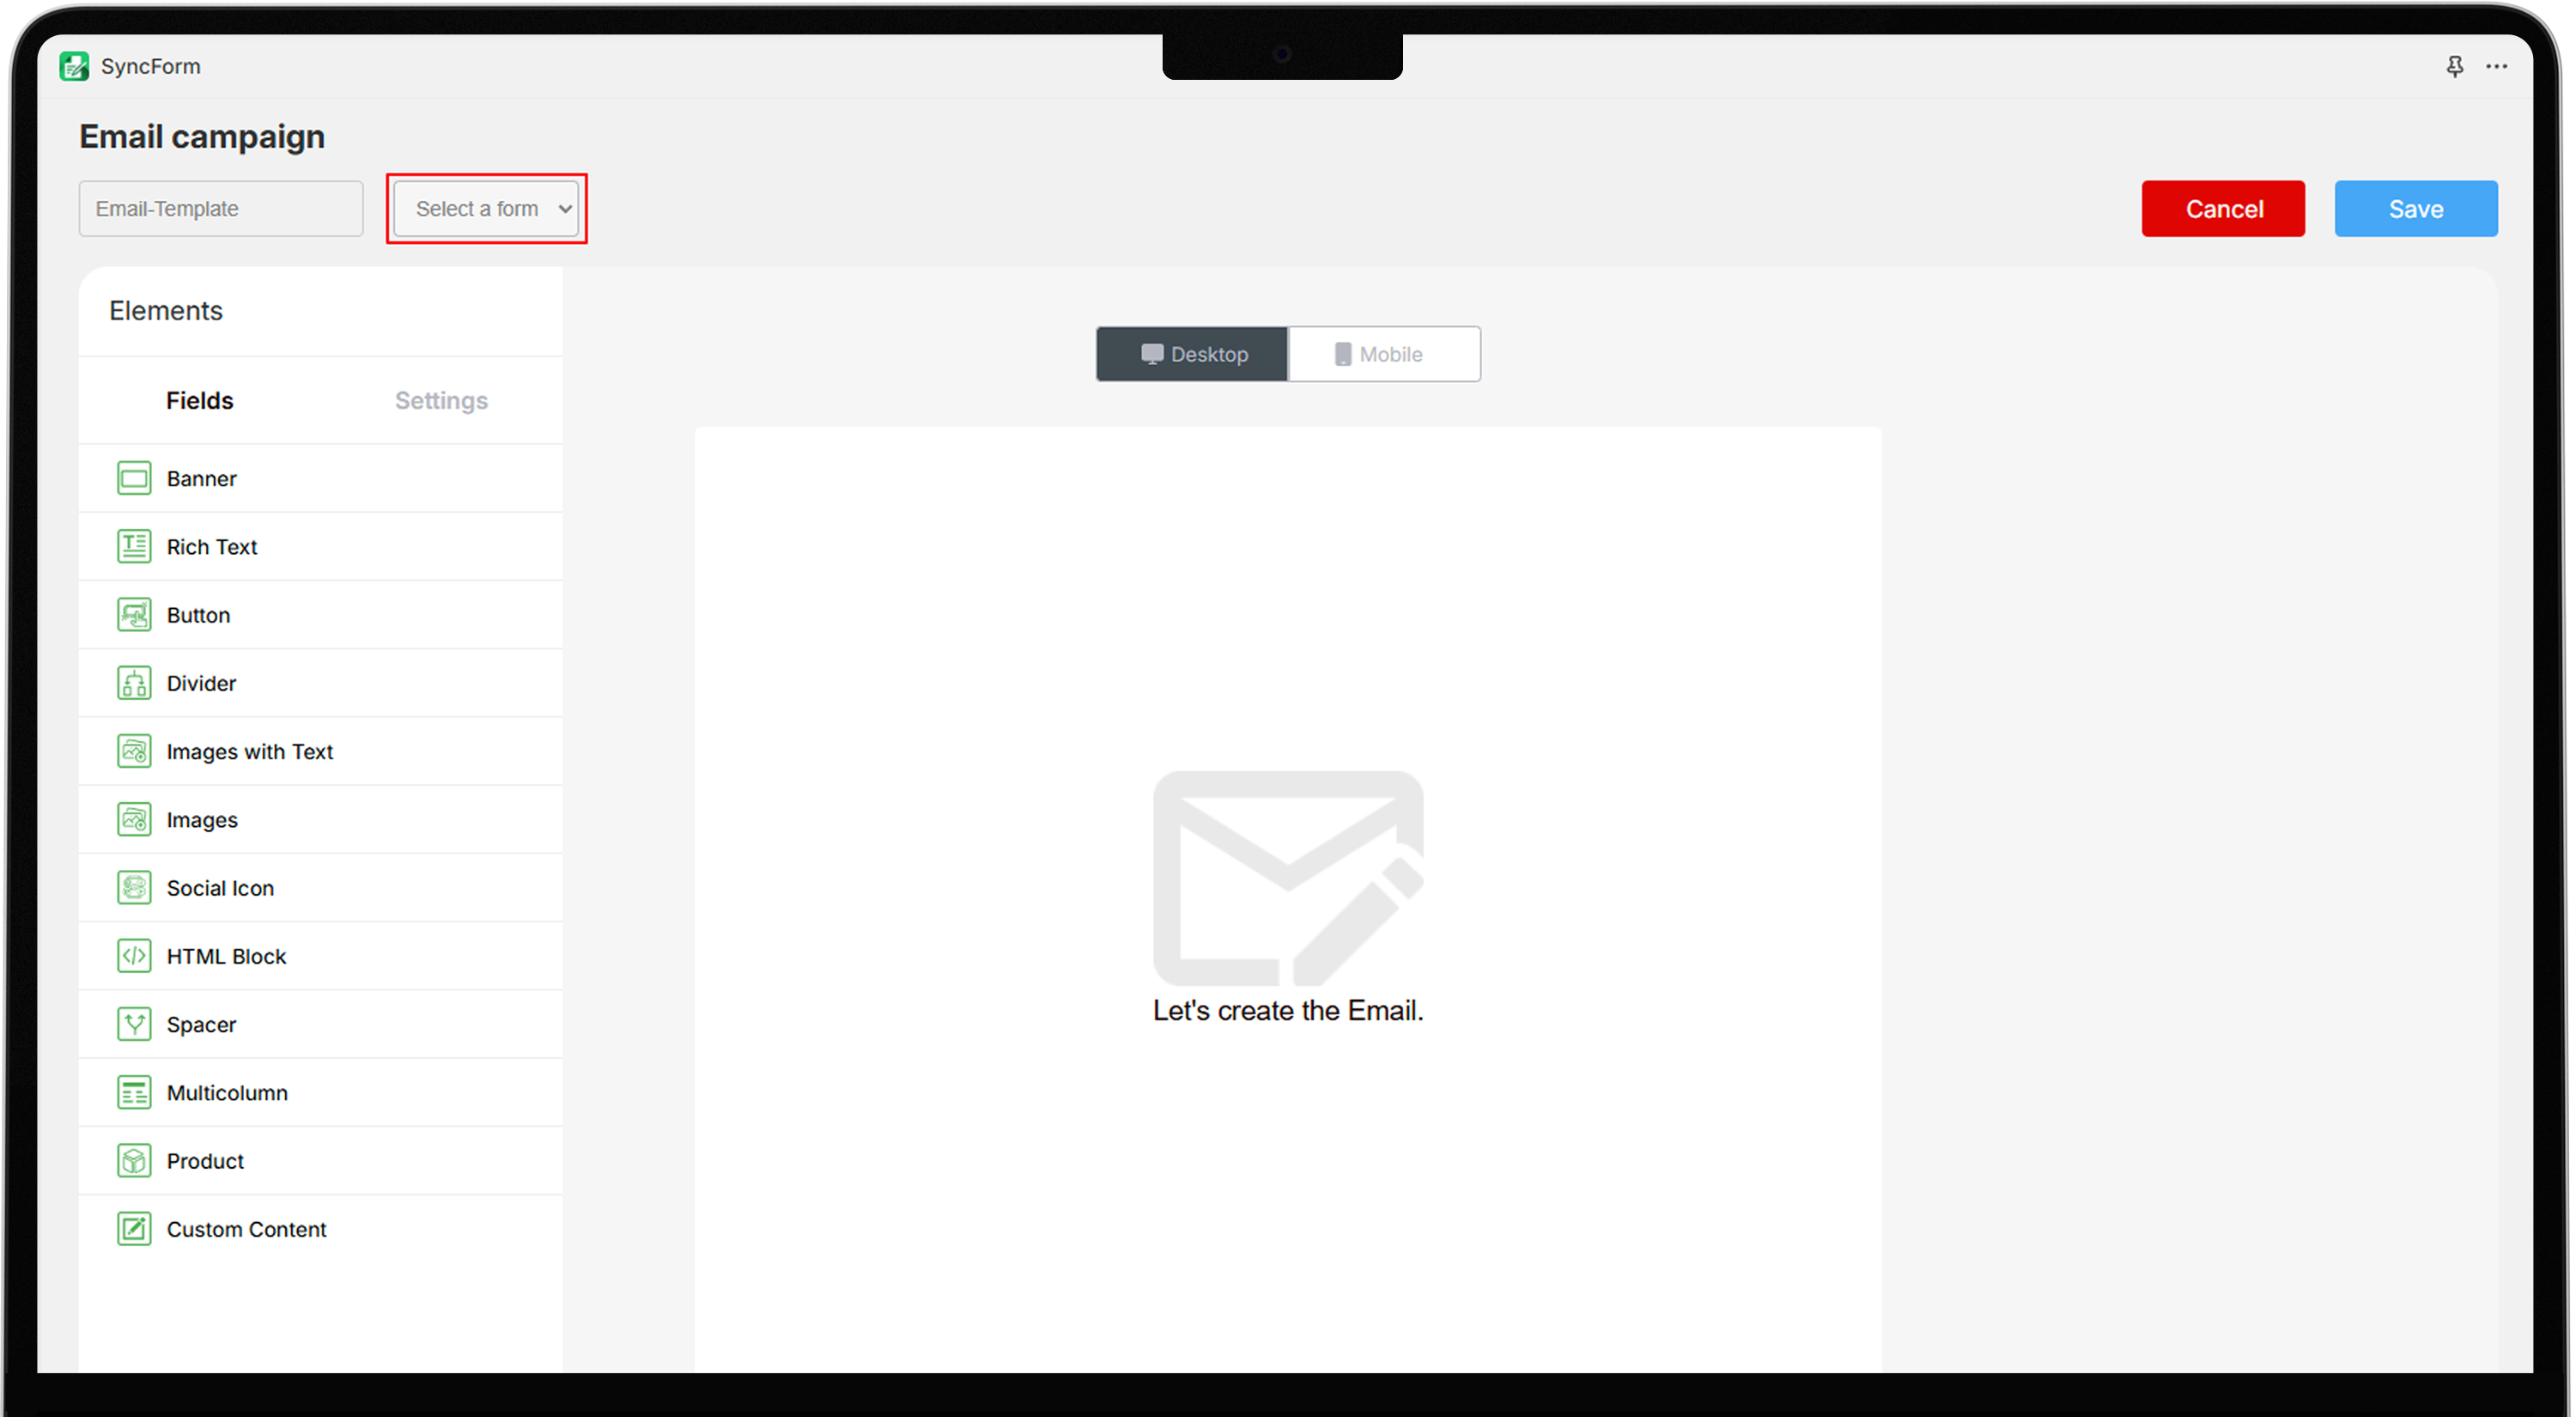
3. Embed the Form into Store
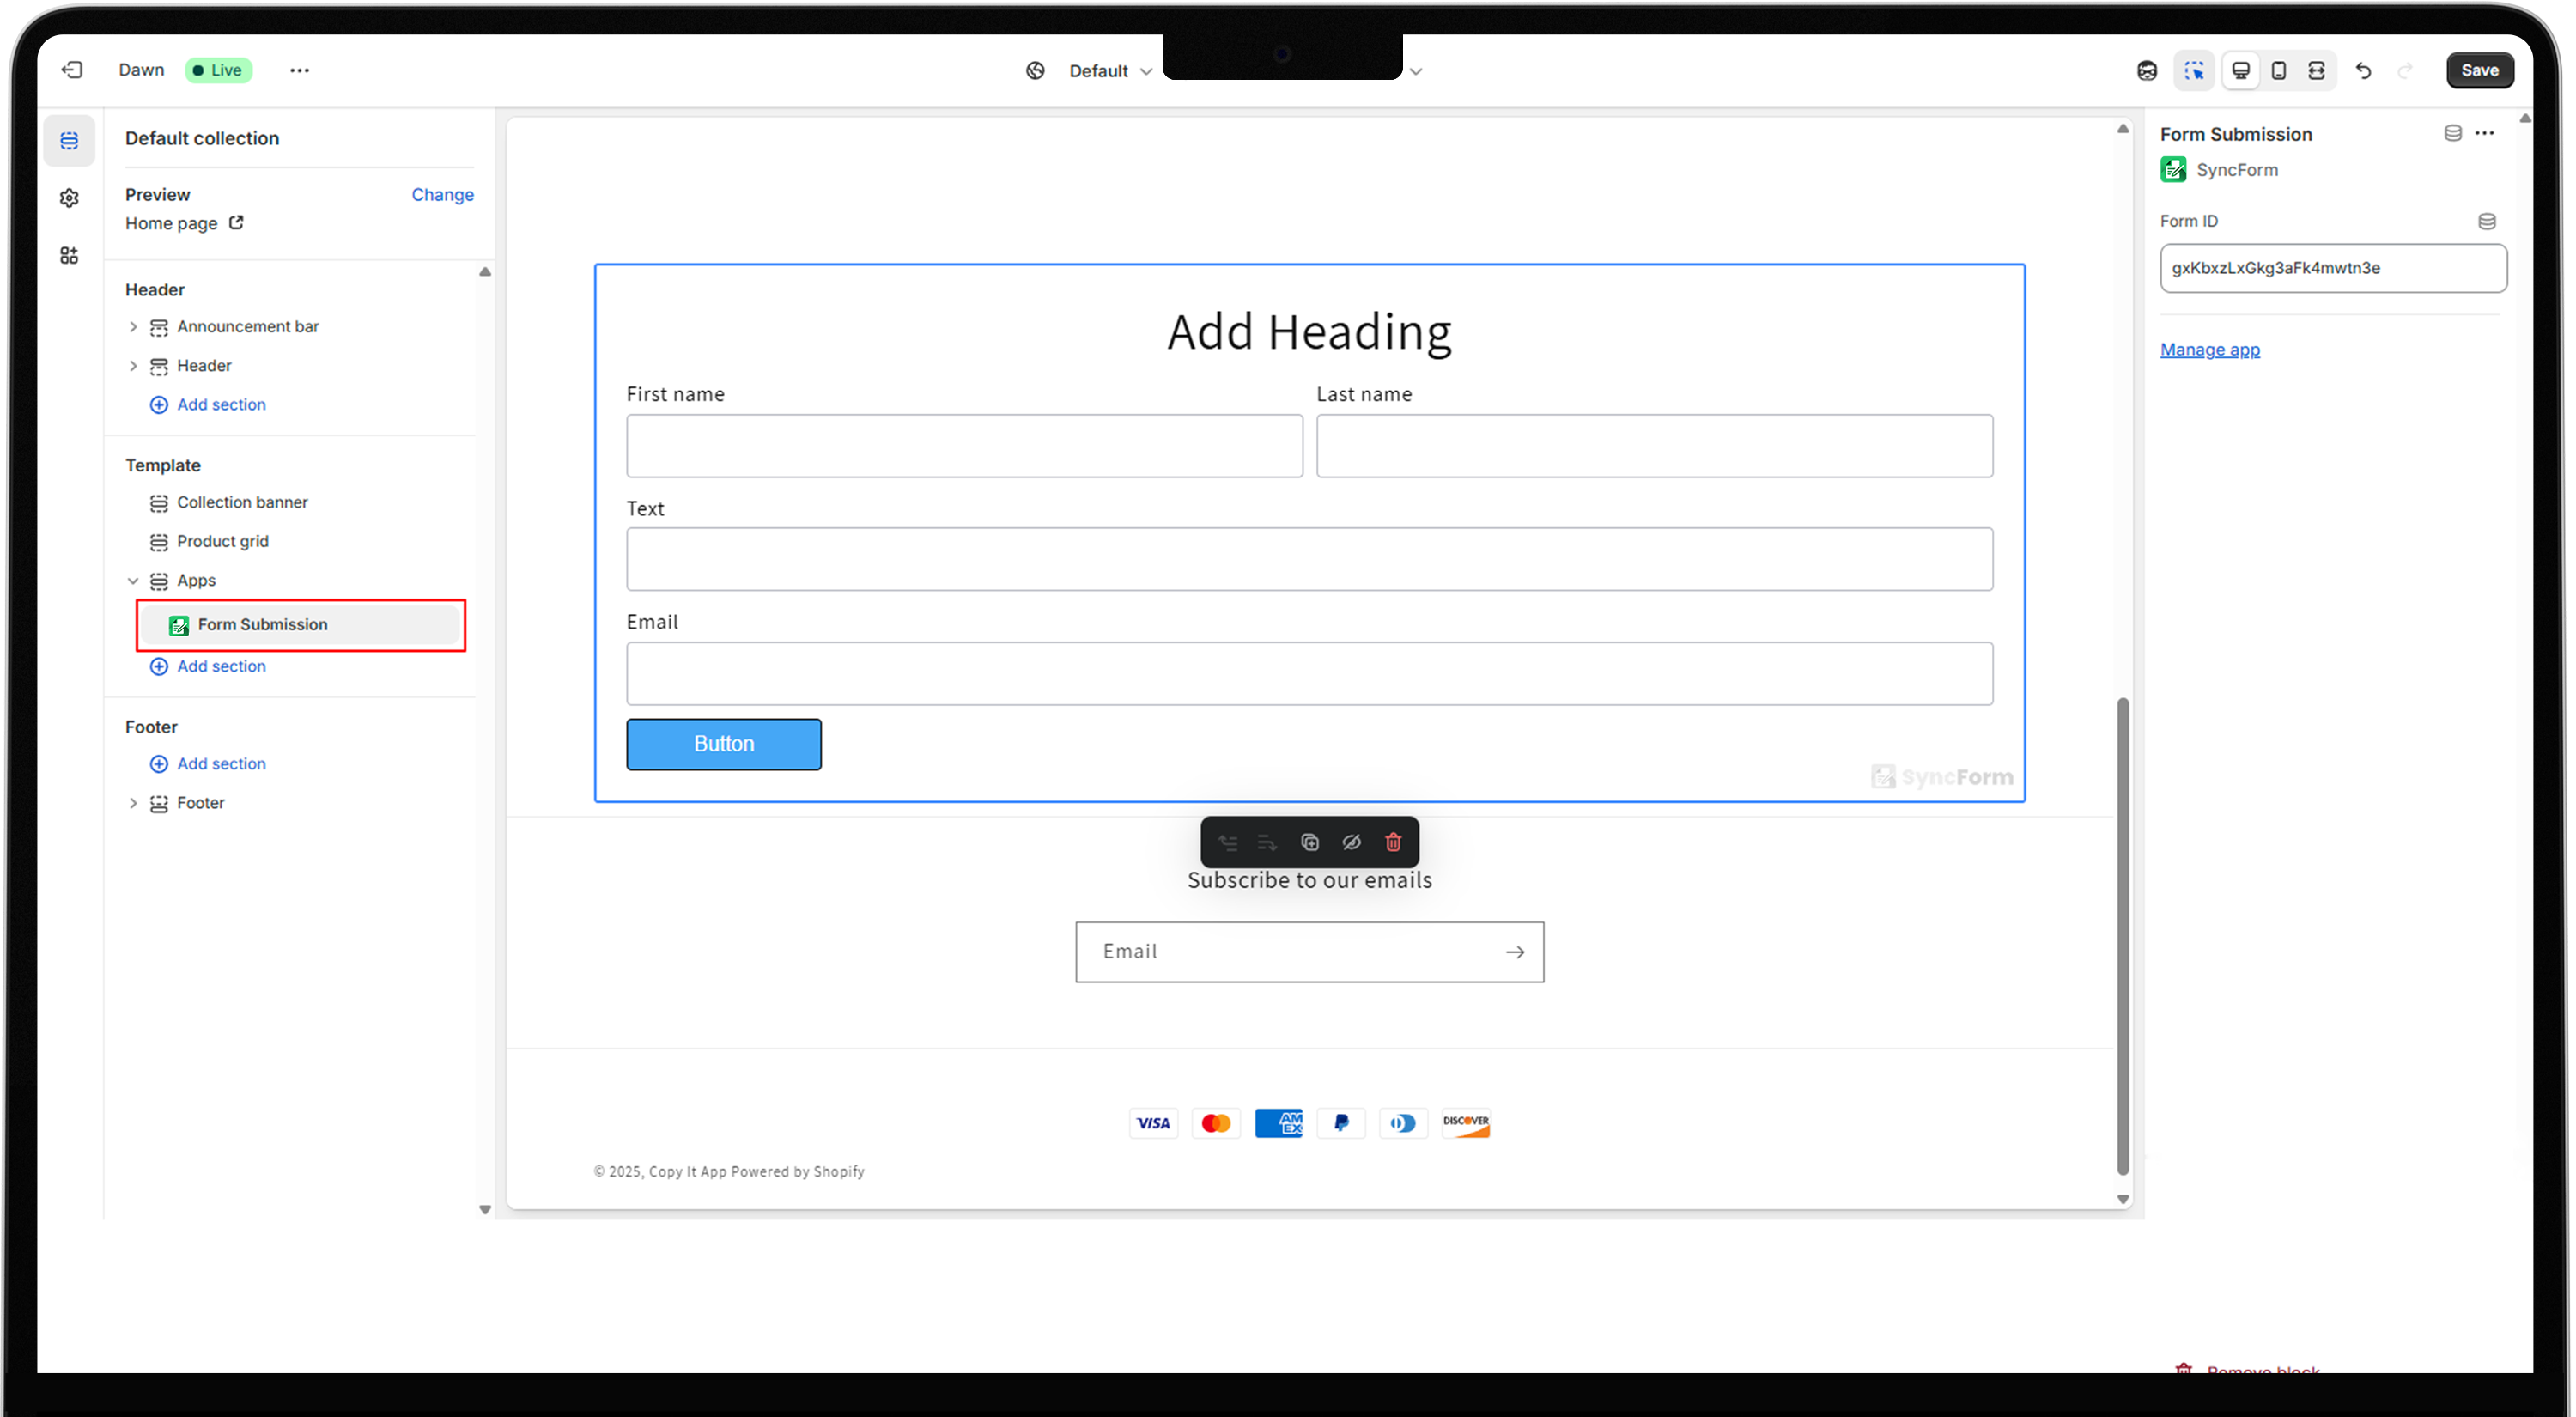
The app will provide a Form ID of the created form. Copy it.
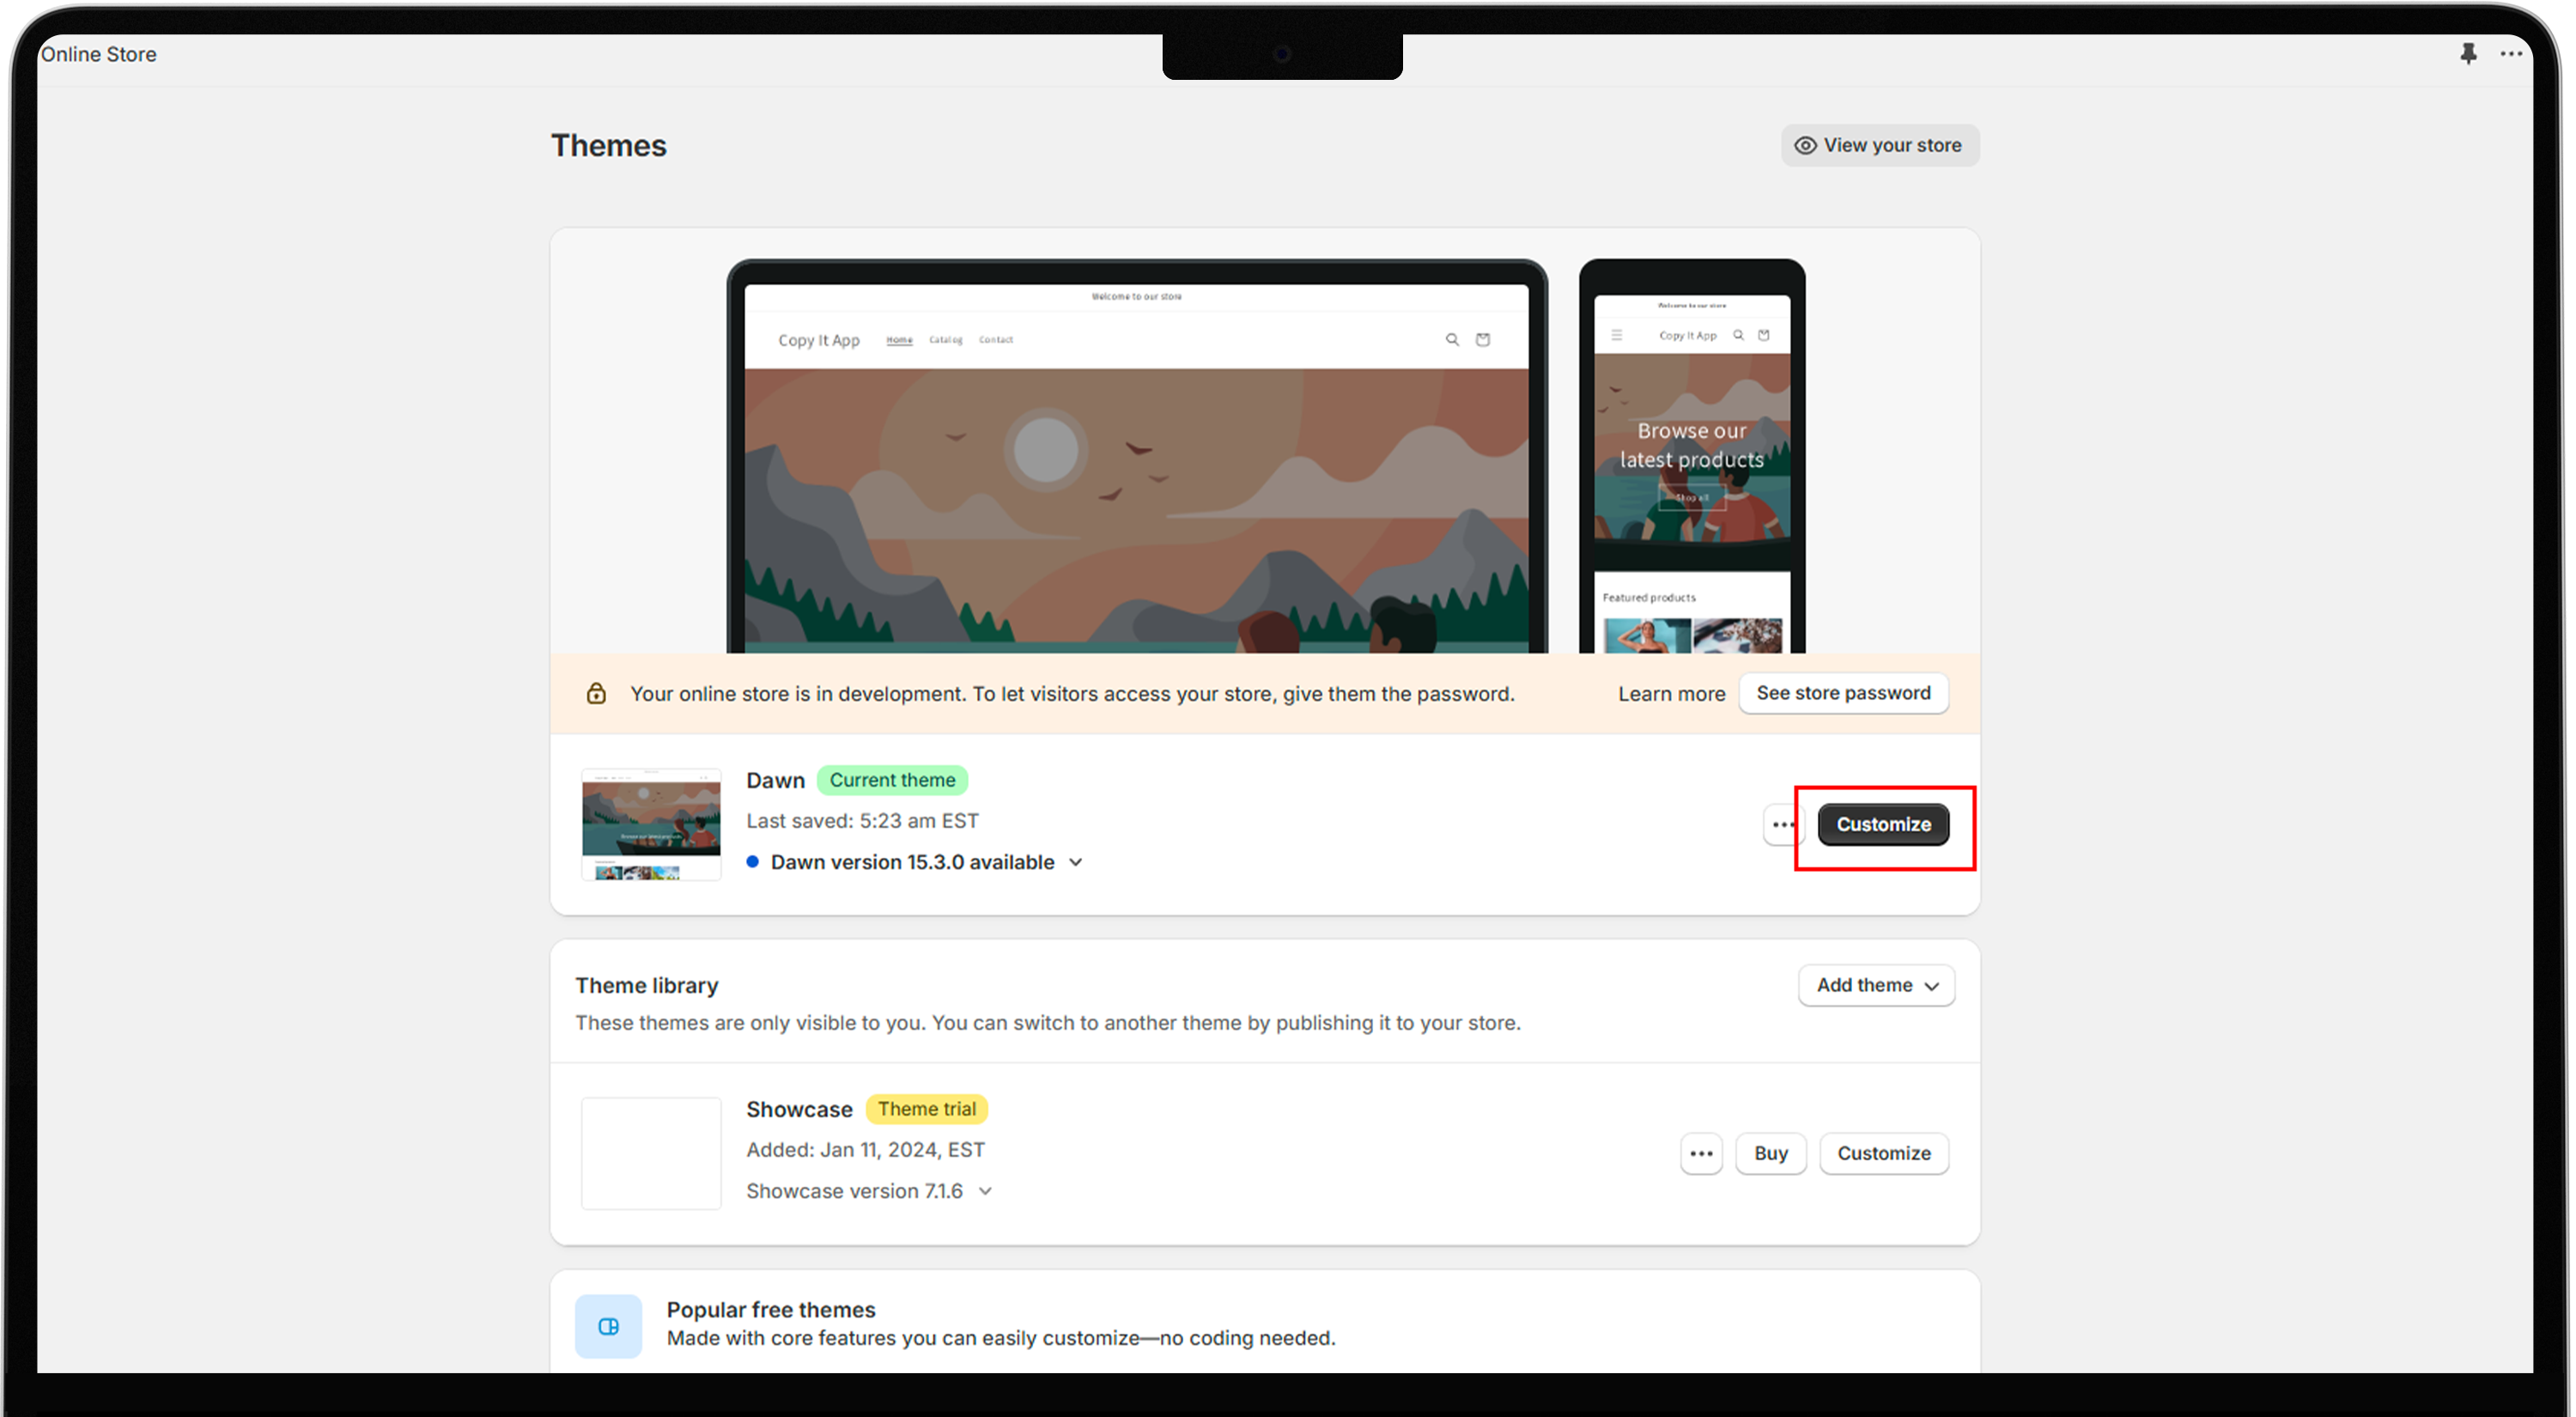
- In the Shopify admin panel, go to Online Store>Themes. Click Customize next to your current theme section.
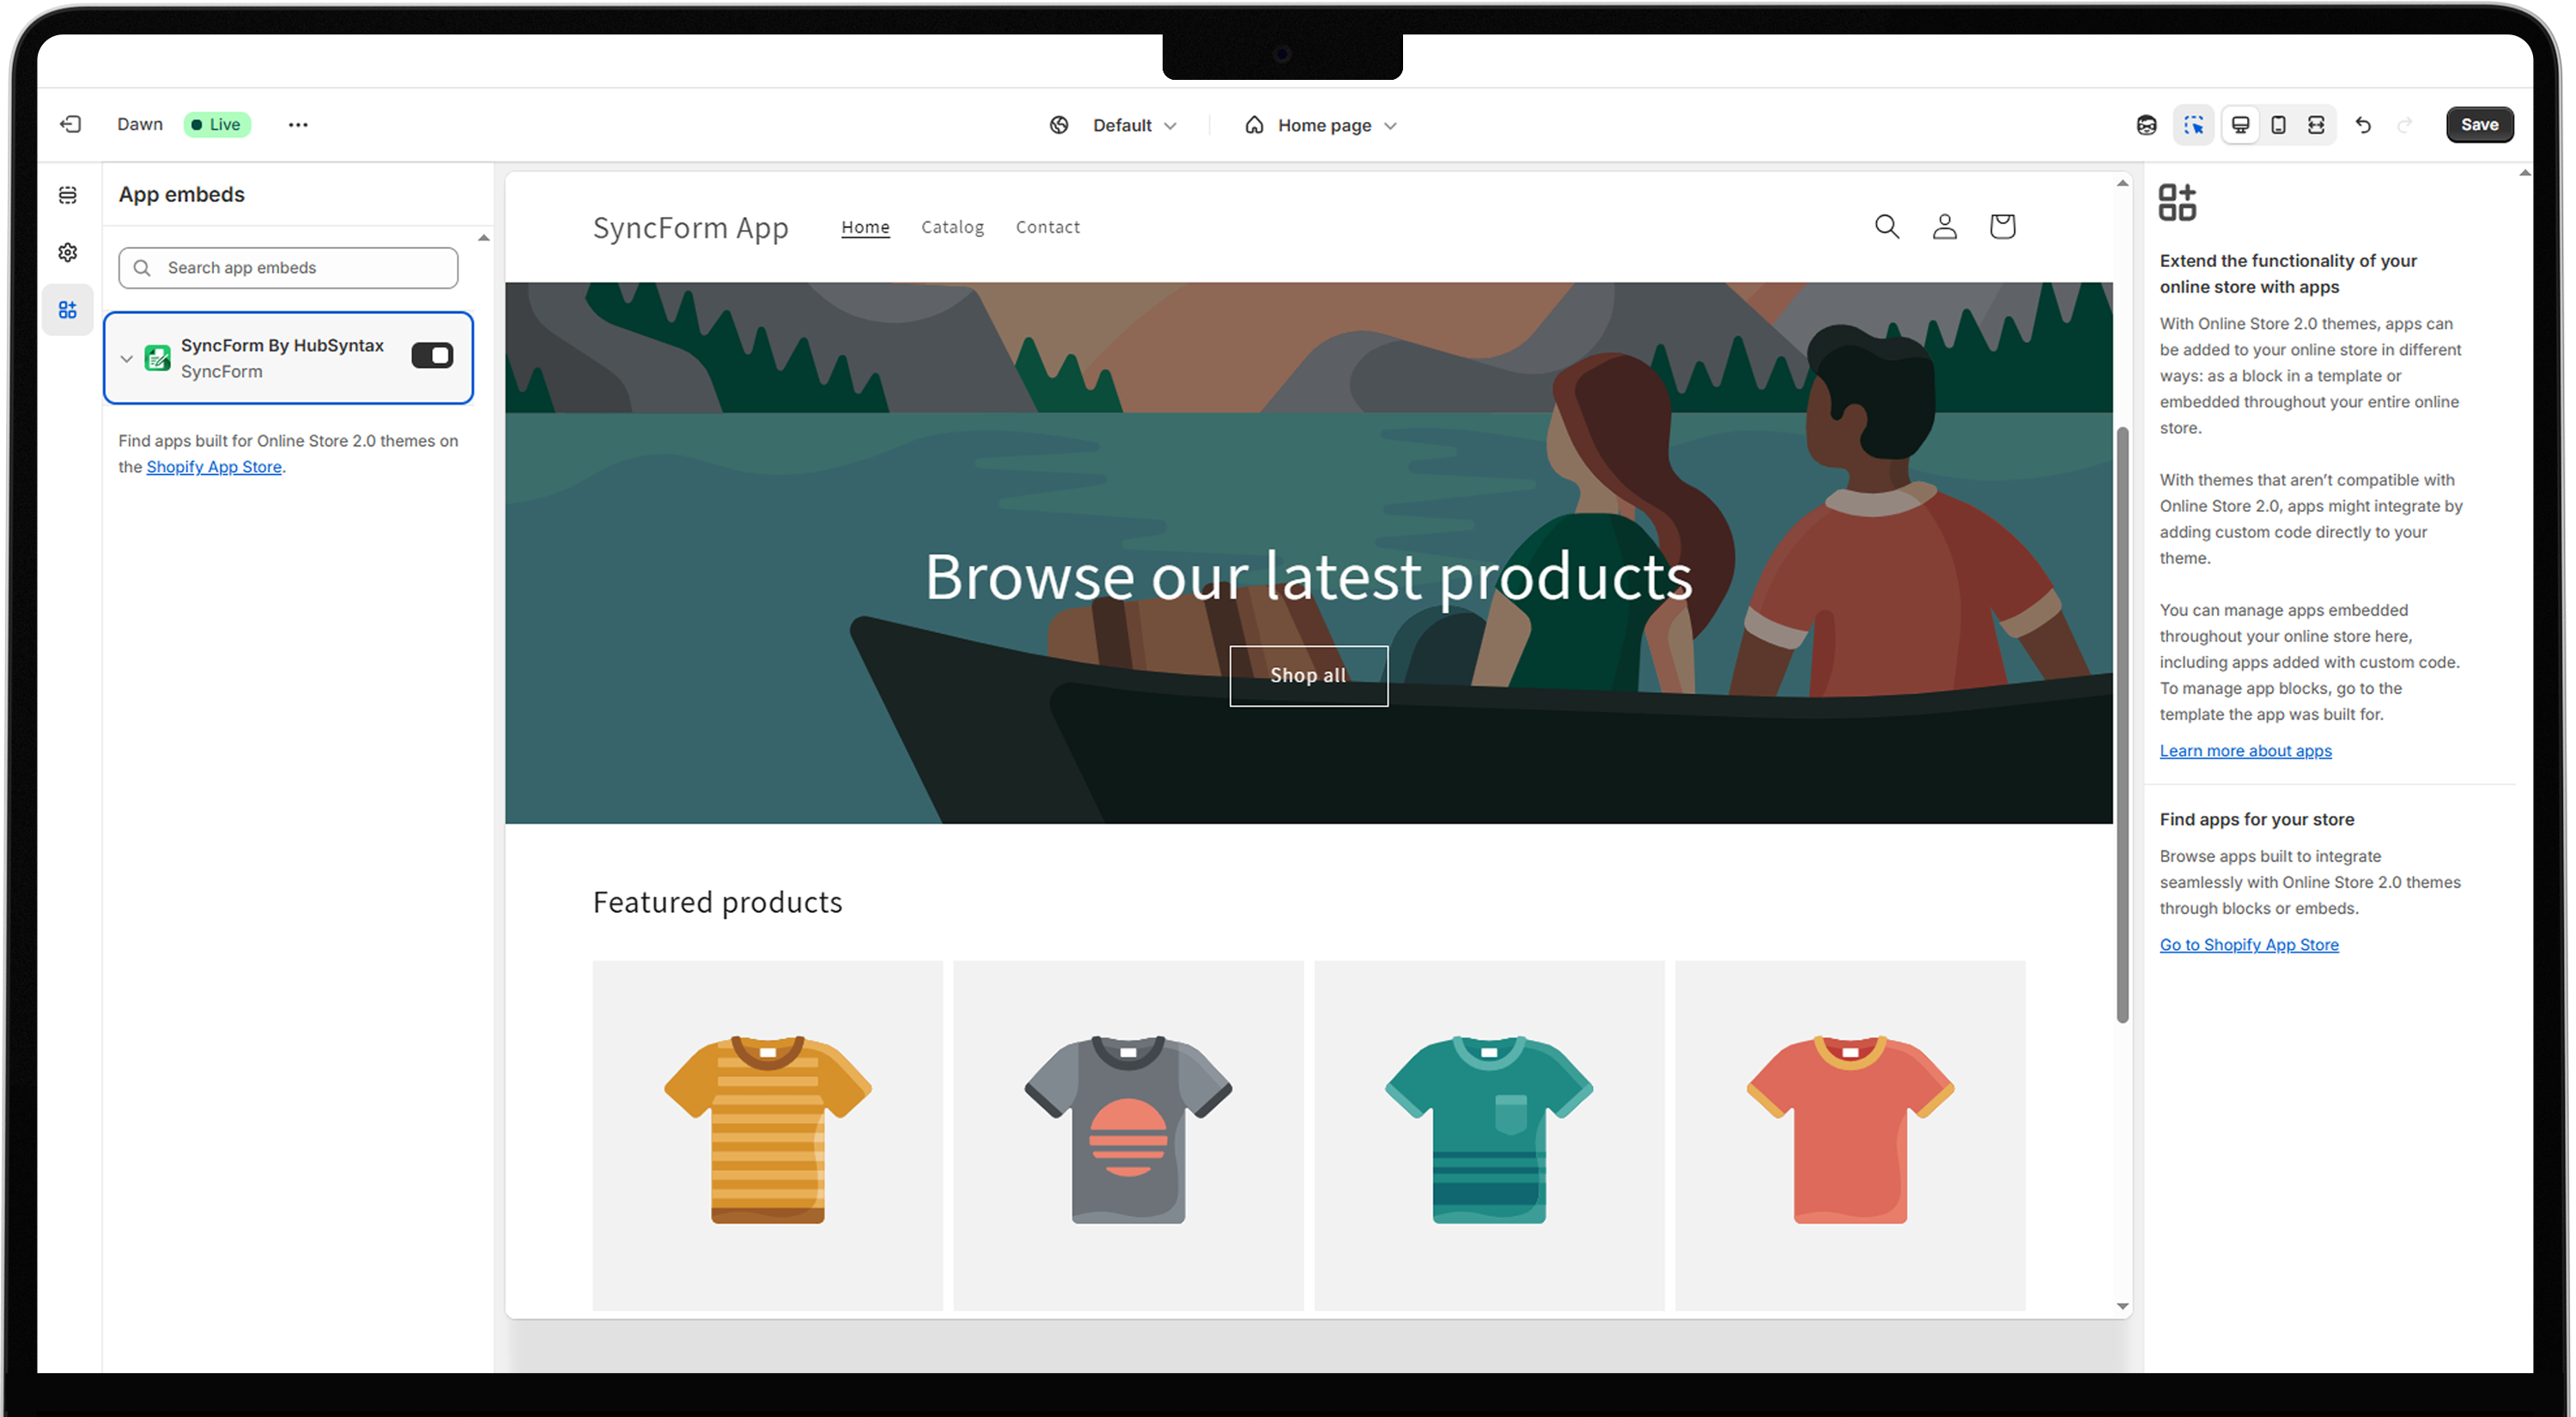
- Select the desired page in which you want to add form. Click on app embed and enable the form builder app.
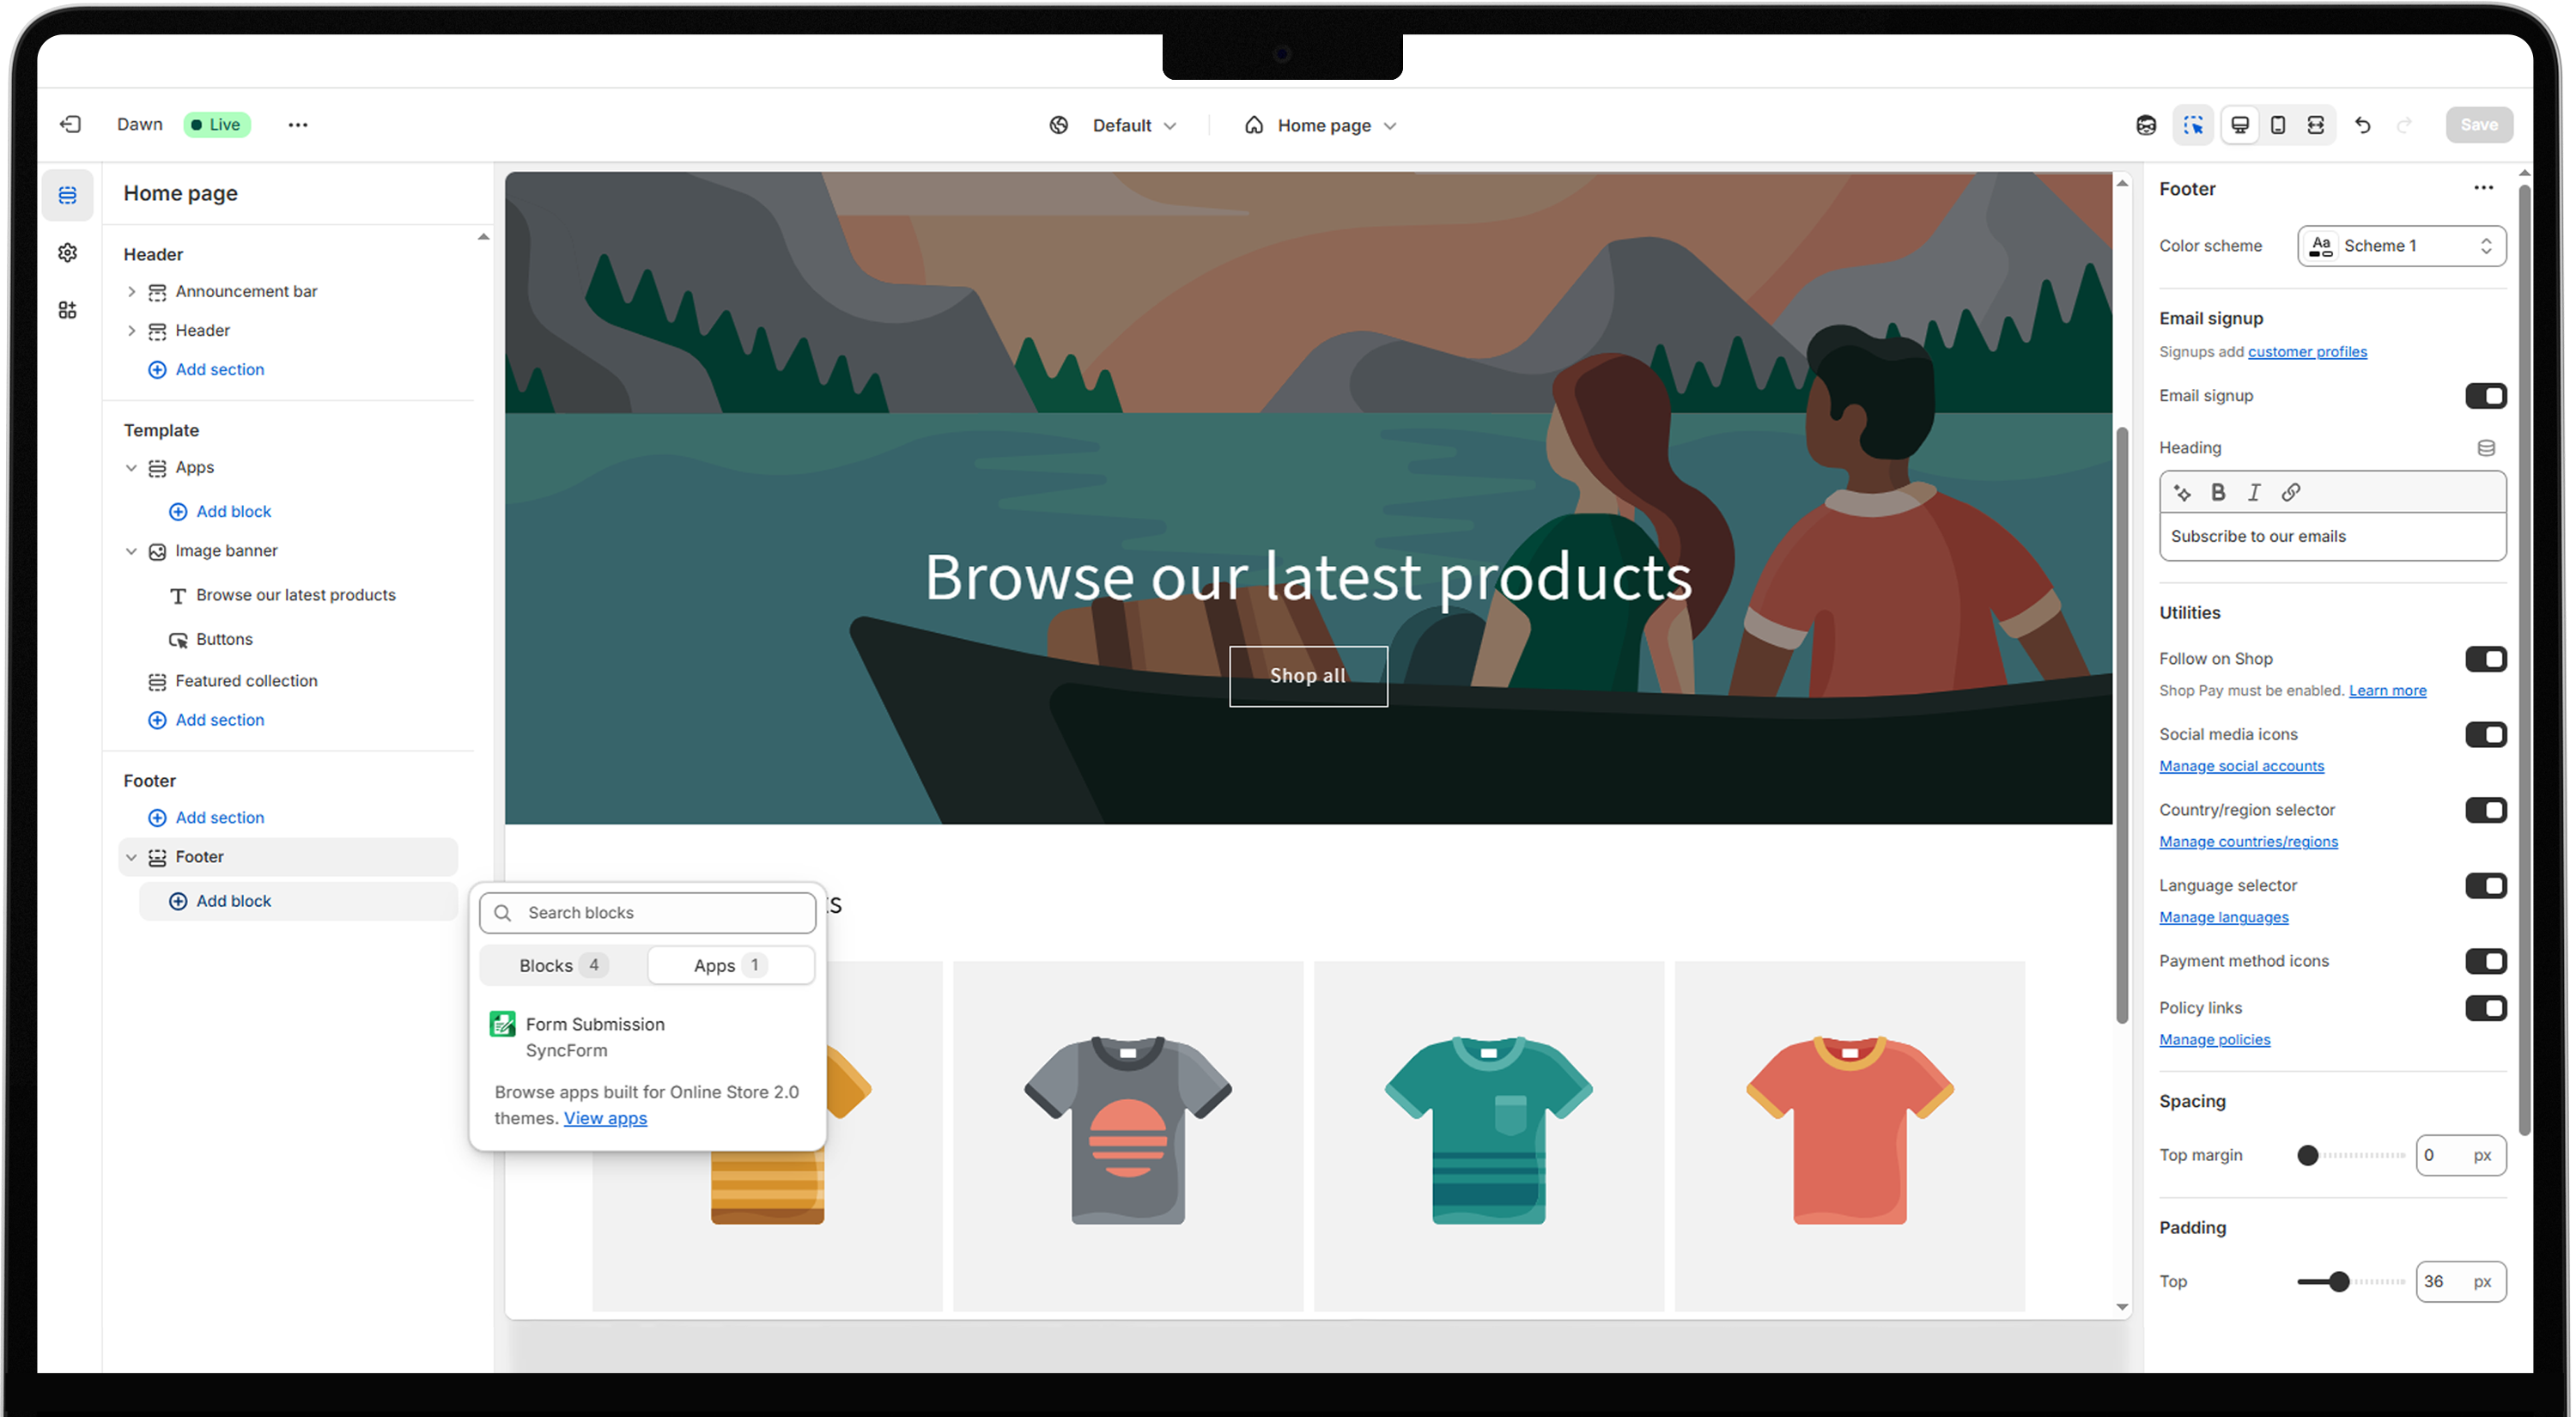
- Click the Add section in the page template. Go to the app and select the form builder app.
- On the right side locate the ID section and paste previously copied Form ID.
- Click Save to embed the form into the store.
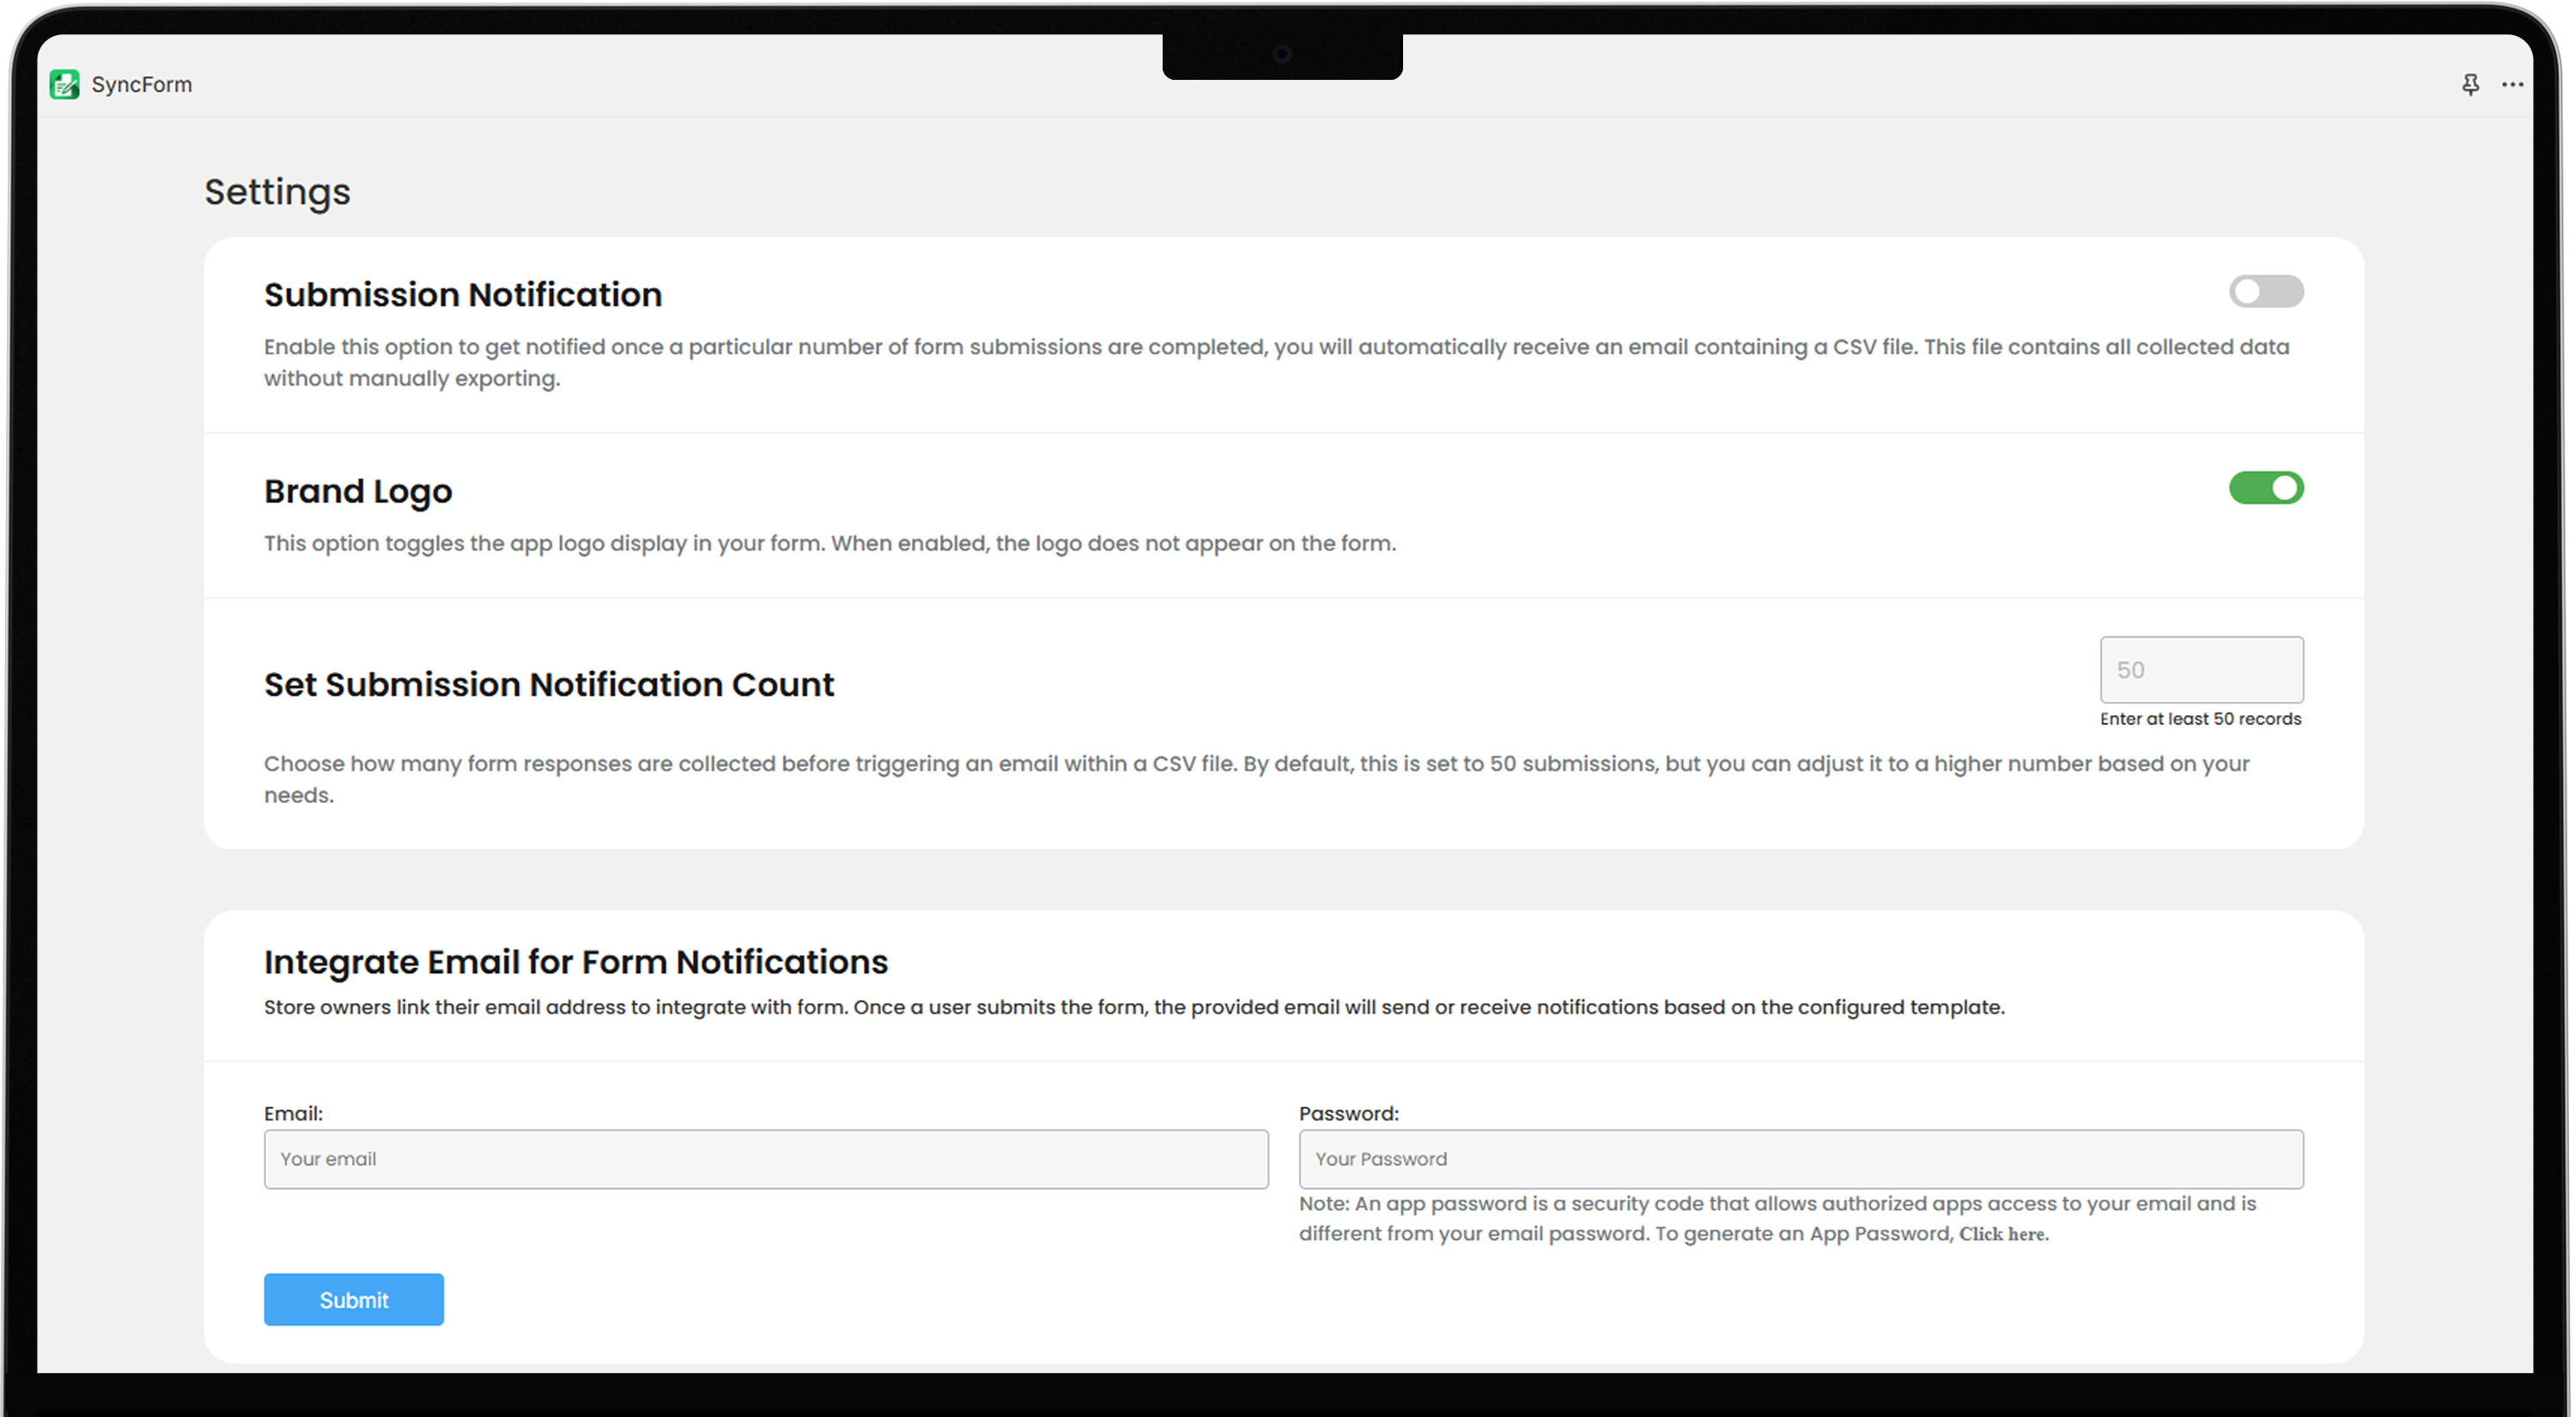
4. Set up Notifications
- In the app dashboard go to Settings located on the top right side. Enter your email and app password to receive an email whenever a new form submission occurs.
- To generate an App Password, go to manage your google account in your Gmail setting.
- Select Security from the menu and enable 2-Step Verification.
- Click App Passwords, enter app name and generate the app password.
- Copy and paste this App Password in the Form Builder settings.
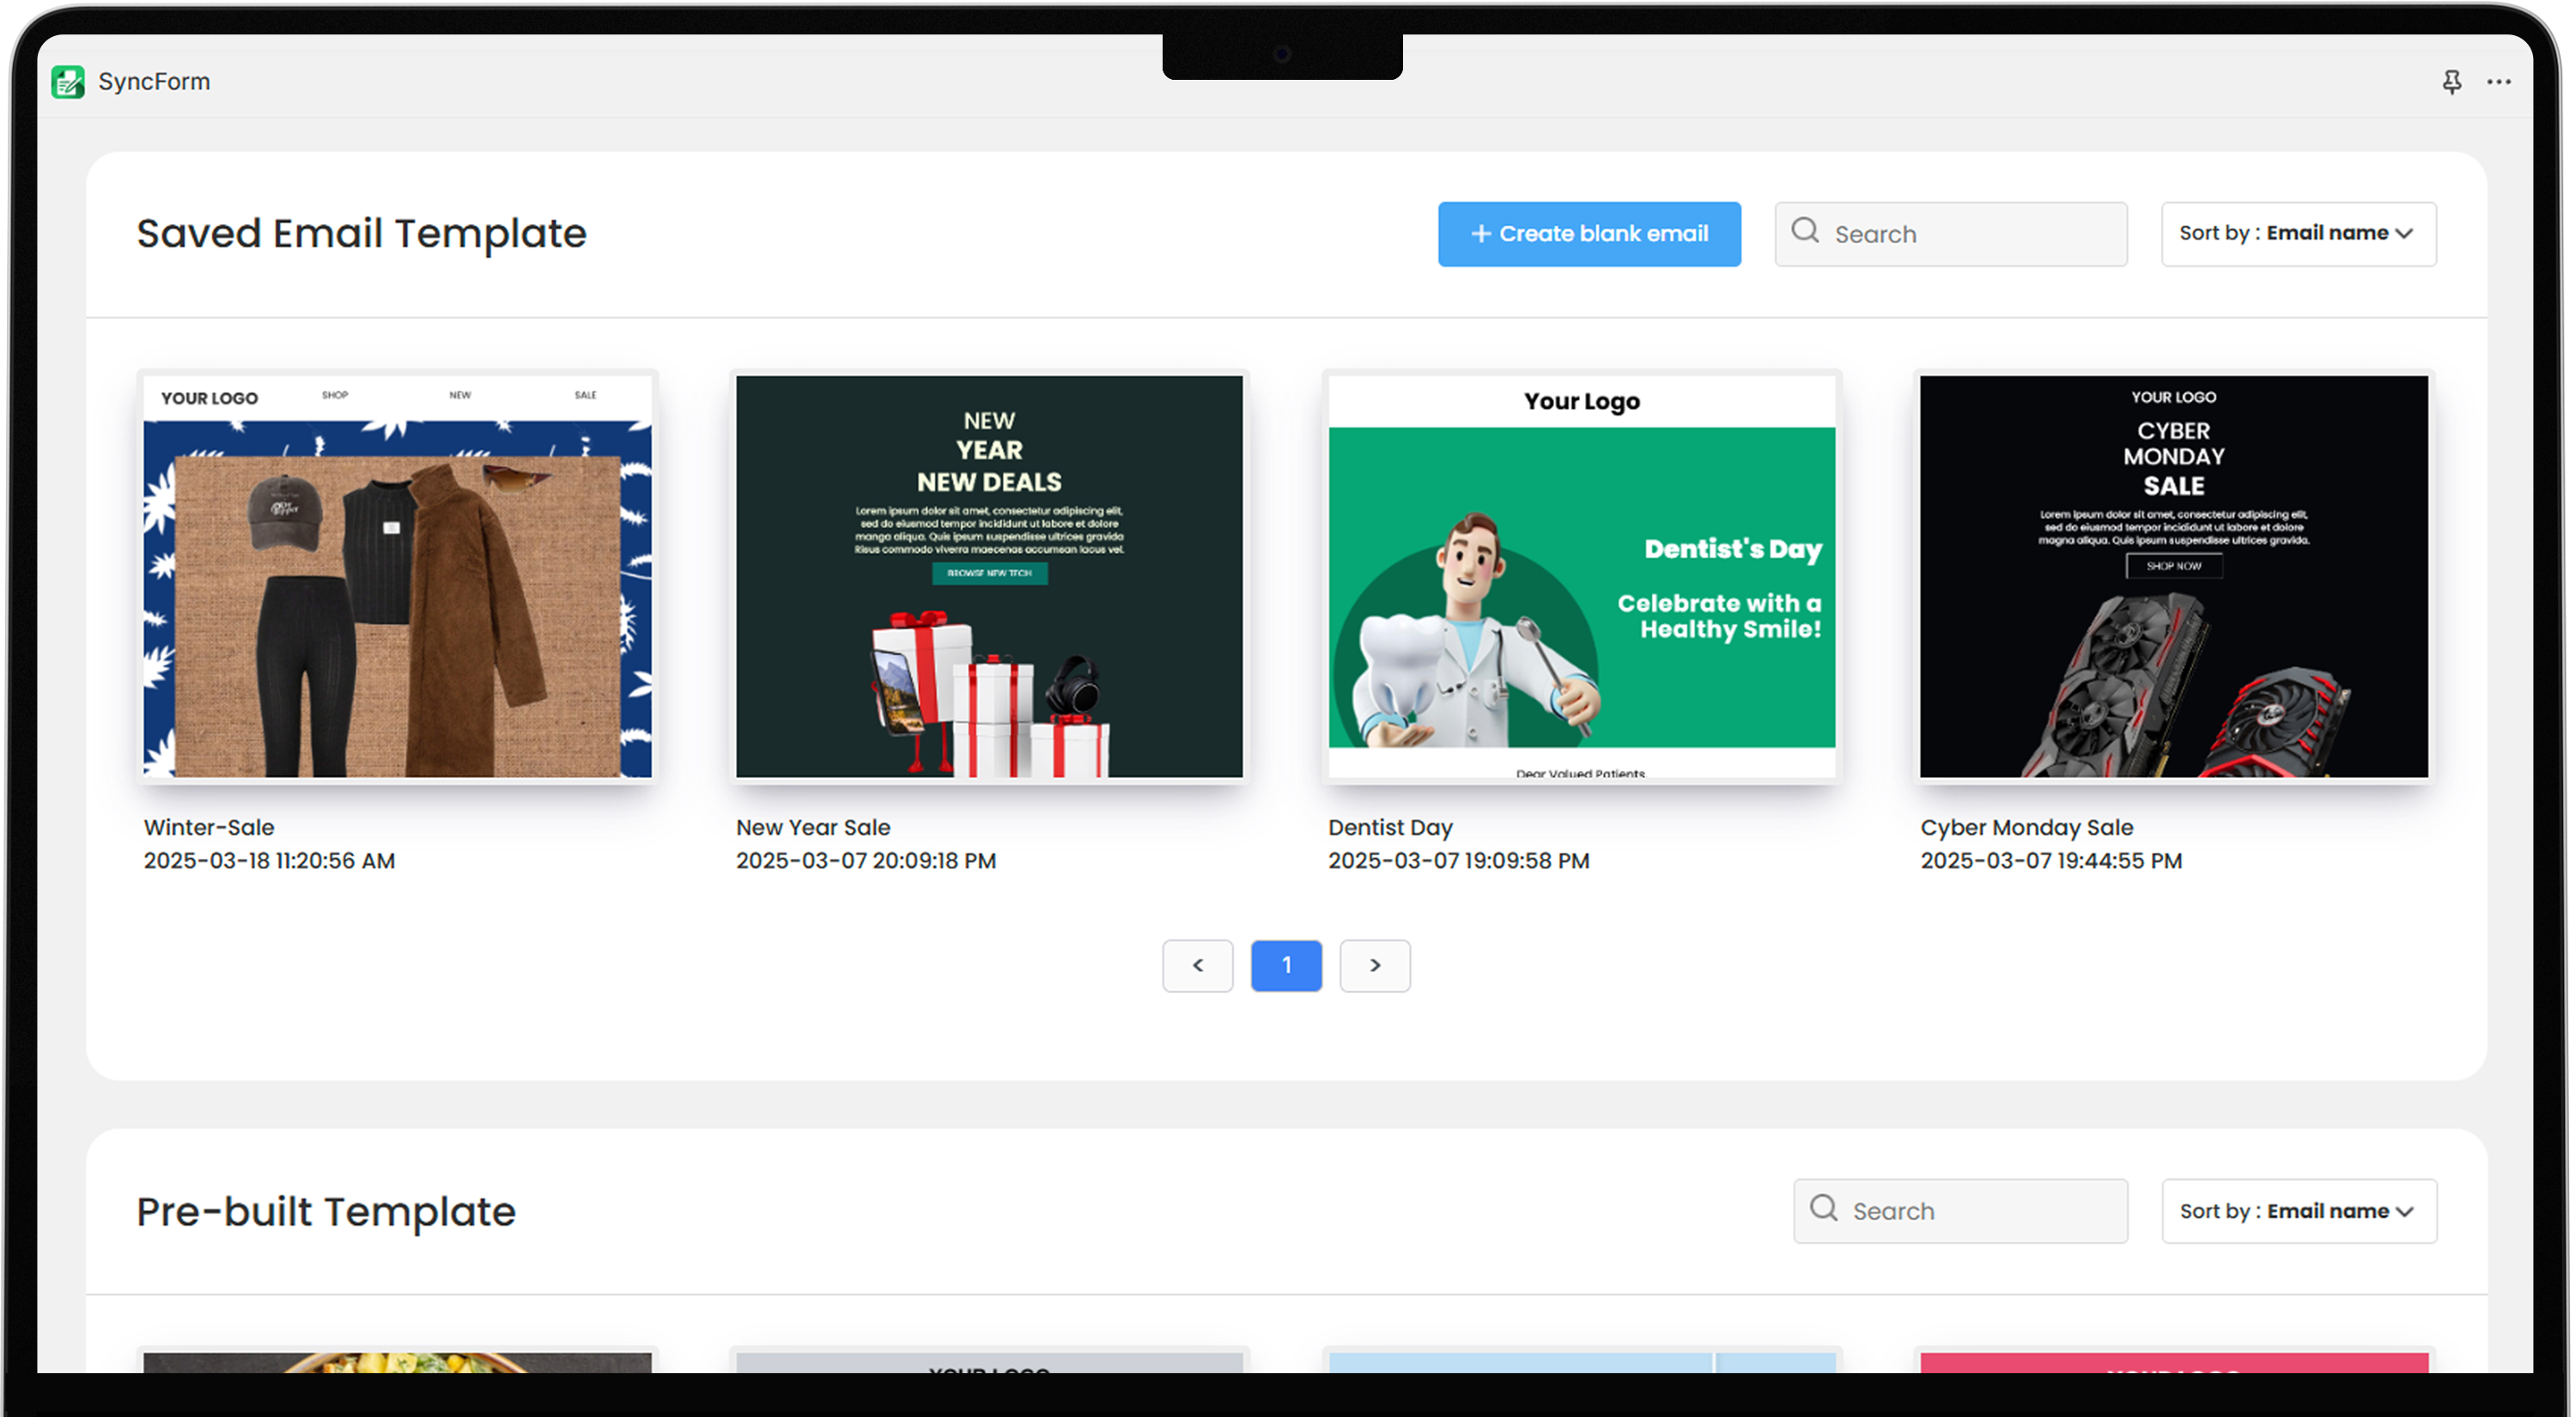
5. Automate Responses
- In the app dashboard, navigate to Email Template to send immediately after signup.
- Choose a pre-built template or create a new template by clicking on Create blank Email Template.
- Enter template name and select the associated name.
- Choose the required fields that should appear in the email.
- Click Save to integrate the email template with form.
6. Test the Form
- Visit your Shopify store and locate the page where the form is embedded.
- Fill out the form and submit it to ensure it works correctly.
Verify that you receive the notification email and the user receives the automated response immediately after successful form submission.
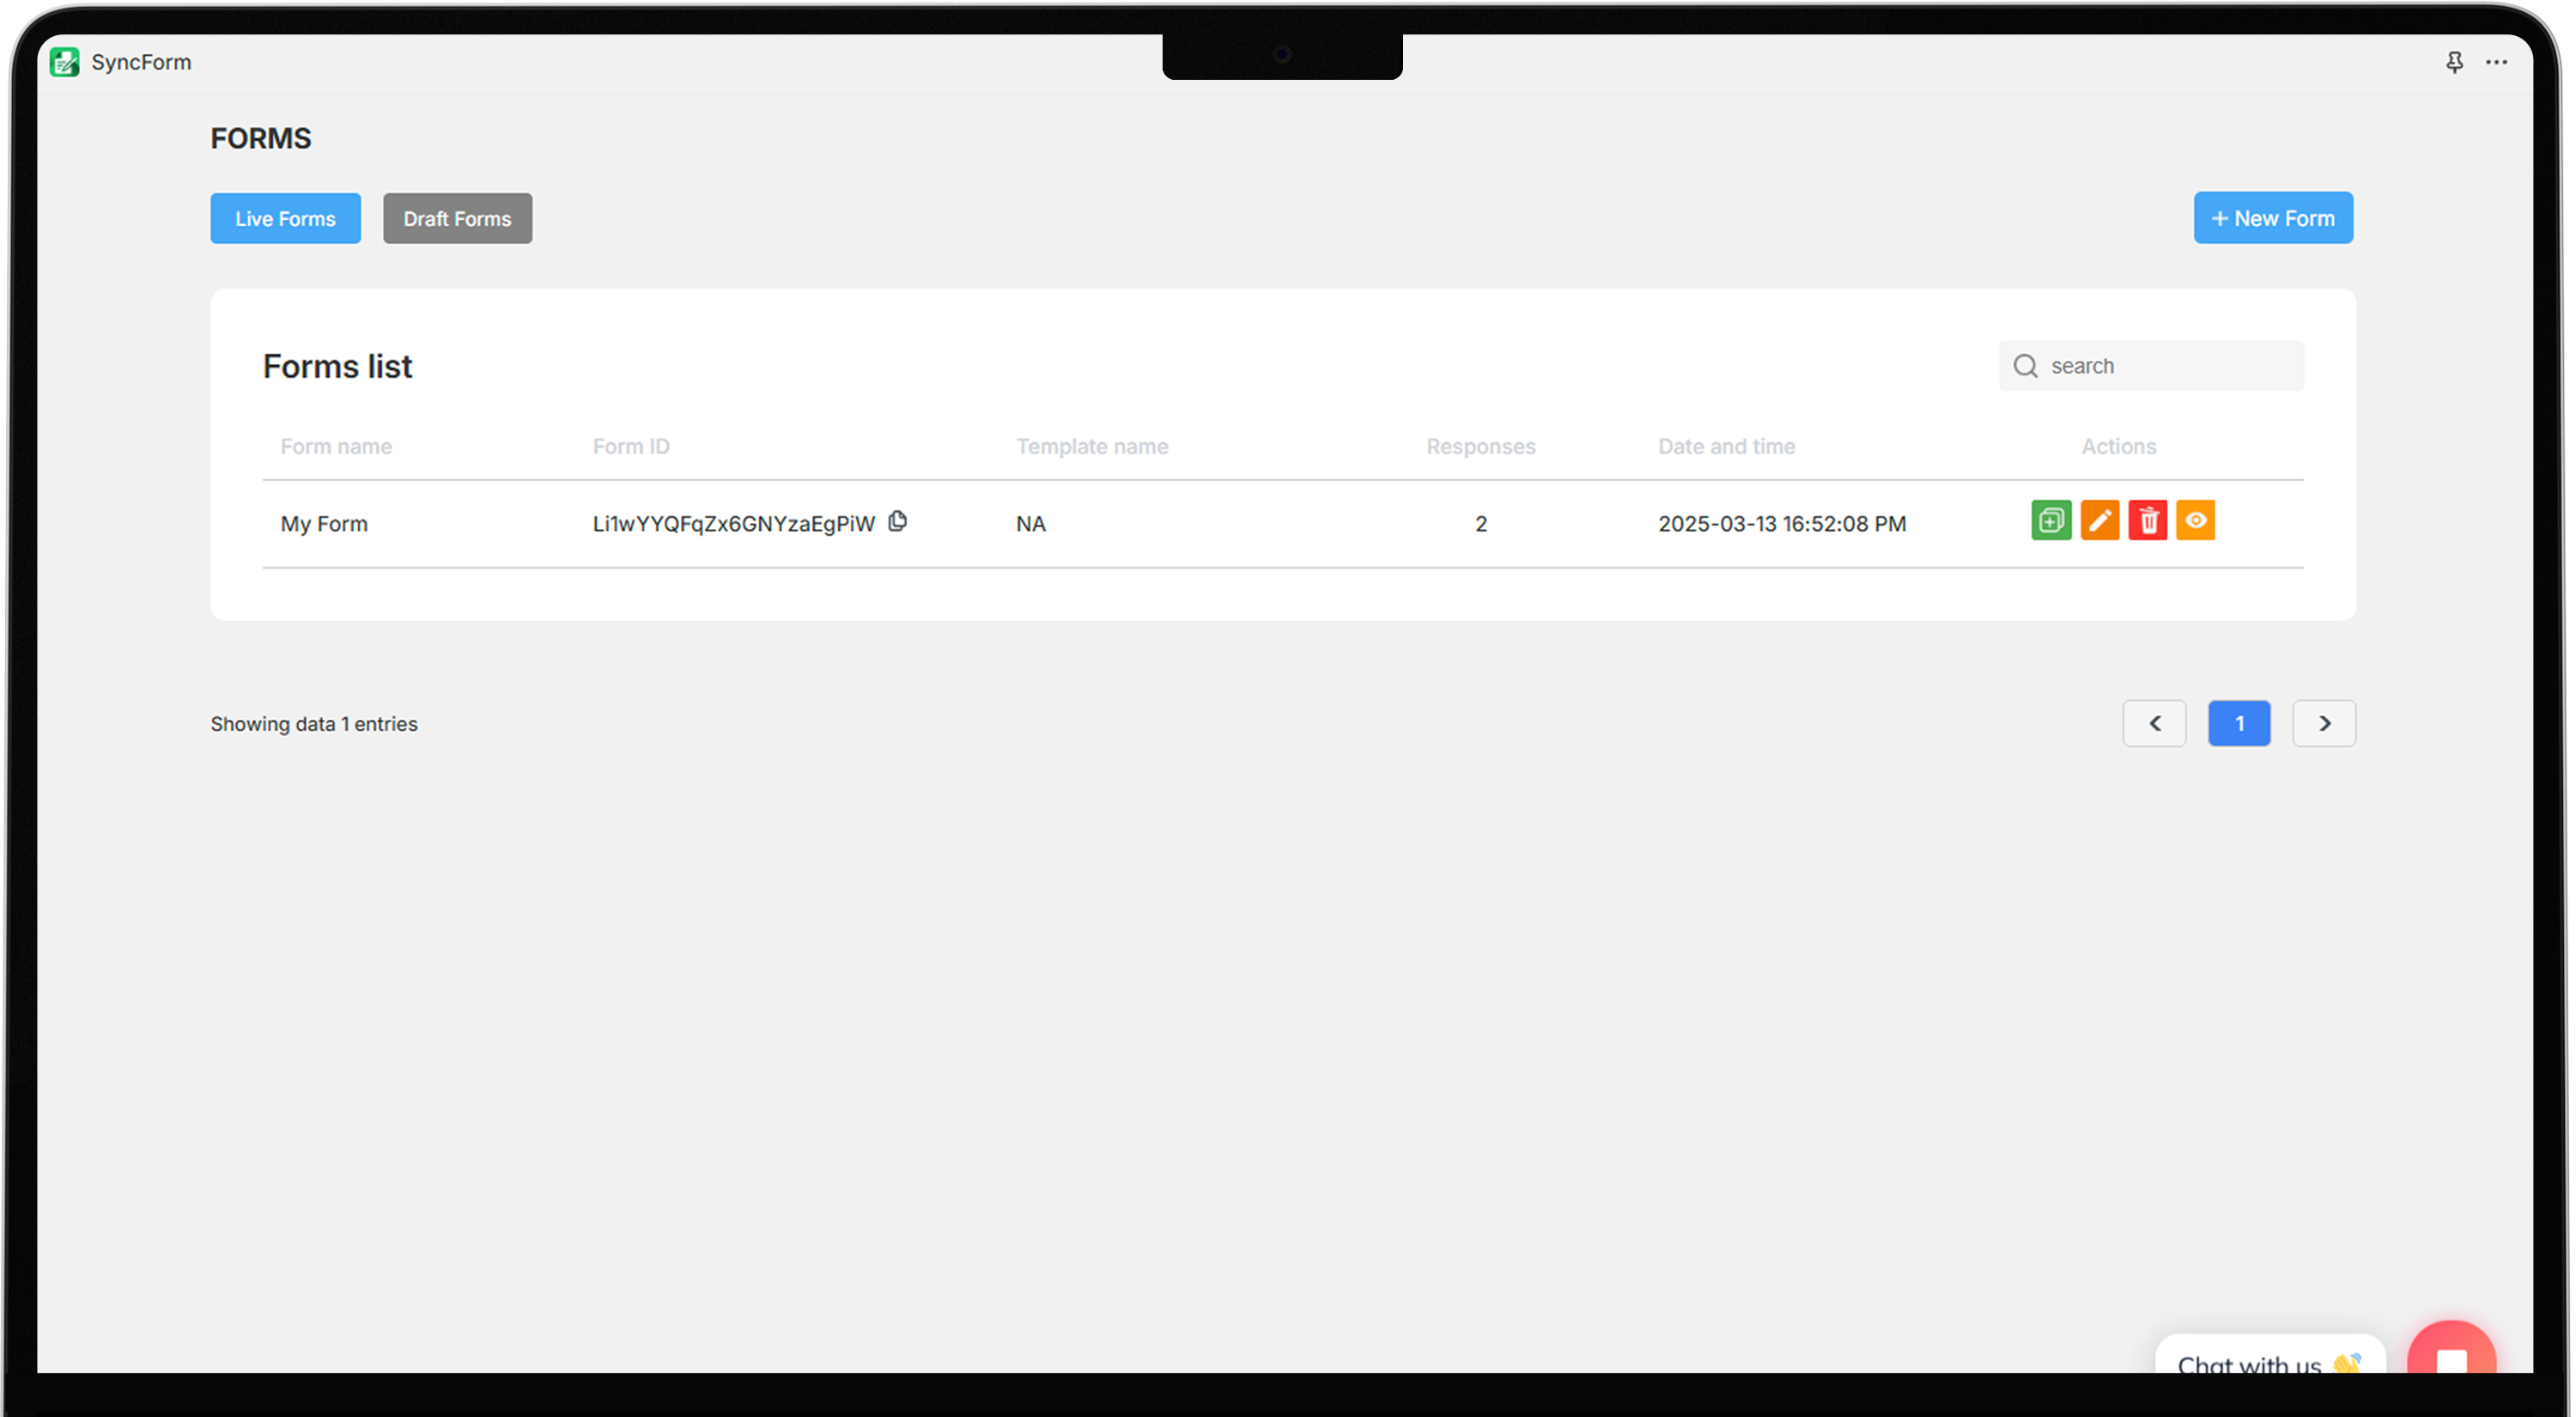
7. Monitor Form Submission
Check form submission in the Customers section of the app dashboard. View all submitted data, including customer detail and response. Export the data for further analysis. Regularly review submissions help to ensure that no responses are missed and that all data is accurately recorded.
Additionally, if there are any issues, such as missing responses or email delivery failures, contact with SyncForm support.